
ArcPy for Beginners: 5 Simple Python Scripts to Automate ArcGIS Pro Workflows
1. Introduction: Why Learn ArcPy?
Imagine you are working on a GIS assignment that requires you to clip 40 datasets to a study area, calculate population density for hundreds of administrative units, and export 12 map layouts as PDFs.
Using the ArcGIS Pro interface, you could complete each task manually. However, repetitive work takes time, and repeating the same operations increases the risk of human error.
There is a better approach: using ArcPy for Beginners ArcGIS Pro to automate your spatial workflows.
ArcPy is Esri’s Python package for working with geographic data, running geoprocessing tools, managing GIS projects, and automating mapping tasks in ArcGIS Pro. It provides Python access to many of the same operations you already perform through the graphical interface.
For university students, learning ArcPy offers several practical advantages:
- Save time: Process multiple datasets with a single script instead of repeating individual operations.
- Improve consistency: Apply the same parameters, calculations, and processing rules across an entire project.
- Make analysis reproducible: Save scripts alongside your thesis data so that you or another researcher can repeat the workflow.
- Build technical skills: Demonstrate programming ability for GIS analyst, spatial data analyst, remote sensing, and GIS developer opportunities.
ArcPy does not guarantee a higher salary or employment, but combining GIS knowledge with scripting and automation can strengthen your technical portfolio.
This tutorial introduces five practical scripts, from setting up a workspace to exporting map layouts. Each example uses standard Python syntax and ArcPy functions available in ArcGIS Pro.
The examples are designed for ArcGIS Pro 3.x. Consult the official ArcPy documentation for version-specific details. If you also need to manage spatial data formats manually alongside your Python scripts, you can check out this guide on how to build and edit geodatabase topology rules.
2. Getting Started: Access the Python Window and Notebooks
Before running your first script, you need a Python environment that supports ArcPy.
ArcPy is included with ArcGIS Pro’s default Python environment, commonly called arcgispro-py3. You generally do not need to install it separately when using the Python tools integrated into ArcGIS Pro.
See Esri’s Python in ArcGIS Pro documentation for environment details.
Option A: Use the ArcGIS Pro Python Window
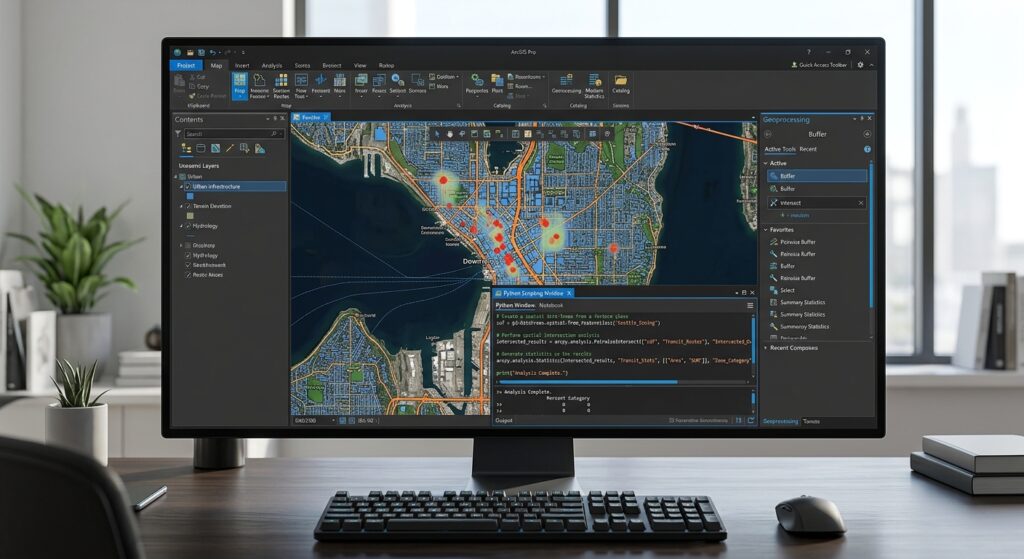
The Python Window is ideal for short commands, testing expressions, and learning ArcPy interactively.
<text> </text>
<AsyncImage query=”Esri ArcGIS Pro Python window interactive Python console ArcGIS Pro interface” aspectRatio=”16:9″ width=”100%”/>
To open it:
- Open your ArcGIS Pro project.
- Click the View tab on the ribbon.
- Select Python Window.
- Type Python commands into the prompt at the bottom of the window and press Enter.
For example, enter:
import arcpy

print(arcpy.GetInstallInfo()["Version"])
The first line imports ArcPy. The second prints the installed ArcGIS Pro version.
You can also test a geoprocessing tool:
import arcpy

arcpy.management.GetCount(
    r"C:\GIS\StudentProject\Data.gdb\Roads"
)
This returns the number of records in the Roads feature class, assuming the path exists.
The Python Window is especially useful when you want to test one or two lines before incorporating them into a larger script.
Option B: Use ArcGIS Notebooks
ArcGIS Notebooks provide a Jupyter Notebook-style environment inside ArcGIS Pro. They let you combine Python code, explanatory text, results, and visualizations in one document.
To create a notebook:
- Click the Insert tab.
- Select New Notebook.
- Create a code cell and enter your Python script.
- Run the cell to see the results.
Notebooks are useful for university assignments because they help document both your workflow and your reasoning. You can explain a calculation, display its output, and then discuss its implications.
Read Esri’s ArcGIS Notebooks guide for more information.
Prepare a sample project
For the examples below, assume you have a project folder structured like this:
C:\GIS\StudentProject\
│
├── Project.gdb
├── Scratch.gdb
├── Input.gdb
├── Clipped.gdb
├── PDFs\
└── StudentProject.aprx
These are example paths, not files ArcGIS Pro creates automatically. Replace them with the actual locations of your geodatabases, project, and output folders.
A file geodatabase is a container for GIS datasets. For example, Input.gdb might contain roads, rivers, administrative boundaries, and sampling locations.
With the setup complete, let’s automate five everyday GIS tasks.
3. Script 1: Setting Workspace and Environment Settings
The problem
When running geoprocessing tools manually, you repeatedly browse to the correct input and output datasets.
ArcPy lets you define workspace and environment settings at the beginning of your script. Tools that honor these settings can then use them as defaults.
Python code
import arcpy

# Define the project's geodatabases
project_gdb = r"C:\GIS\StudentProject\Project.gdb"
scratch_gdb = r"C:\GIS\StudentProject\Scratch.gdb"

# Confirm that the geodatabases exist
for gdb in (project_gdb, scratch_gdb):
    if not arcpy.Exists(gdb):
        raise FileNotFoundError(f"Geodatabase not found: {gdb}")

# Set the main workspace
arcpy.env.workspace = project_gdb

# Set the temporary processing workspace
arcpy.env.scratchWorkspace = scratch_gdb

# Allow existing outputs to be overwritten
arcpy.env.overwriteOutput = True

# Display the active settings
print("Workspace:", arcpy.env.workspace)
print("Scratch workspace:", arcpy.env.scratchWorkspace)
print("Overwrite enabled:", arcpy.env.overwriteOutput)
Line-by-line explanation
Line 1 — Import ArcPy
import arcpyThis loads the ArcPy package so Python can access ArcGIS Pro functionality.
Lines 4–5 — Define the workspace paths
project_gdb = r"C:\GIS\StudentProject\Project.gdb"
scratch_gdb = r"C:\GIS\StudentProject\Scratch.gdb"
These variables store the locations of your main and temporary geodatabases.
The letter r before a string creates a raw string, which makes Windows file paths easier to write because backslashes are interpreted literally.
Lines 8–10 — Check that both geodatabases exist
for gdb in (project_gdb, scratch_gdb):
    if not arcpy.Exists(gdb):
        raise FileNotFoundError(f"Geodatabase not found: {gdb}")
The for loop checks each path. If a geodatabase cannot be found, raise stops the script and displays an informative error.
Line 13 — Set the main workspace
arcpy.env.workspace = project_gdbThis establishes the default workspace for functions and tools that honor the workspace environment. For example, listing functions can use it to determine where to search for datasets.
Line 16 — Set the scratch workspace
arcpy.env.scratchWorkspace = scratch_gdbThis identifies a location for temporary processing outputs when a tool uses the scratch workspace environment.
Line 19 — Enable overwriting
arcpy.env.overwriteOutput = TrueThis permits tools that honor this setting to replace existing outputs with the same names.
Use this setting carefully. An output file that you wanted to preserve could be overwritten.
Final lines — Print the settings
The print() statements show the values currently assigned to the environment variables.
When should you use this script?
Use it at the beginning of longer scripts so your workspace is configured before you process data.
Important: Defining a workspace does not automatically redirect every output. Explicit output paths, such as C:\GIS\StudentProject\Output.gdb\ClippedRoads, remain preferable when you want precise control over where results are saved.
4. Script 2: Batch Clipping Vectors to a Study Area Boundary
The problem
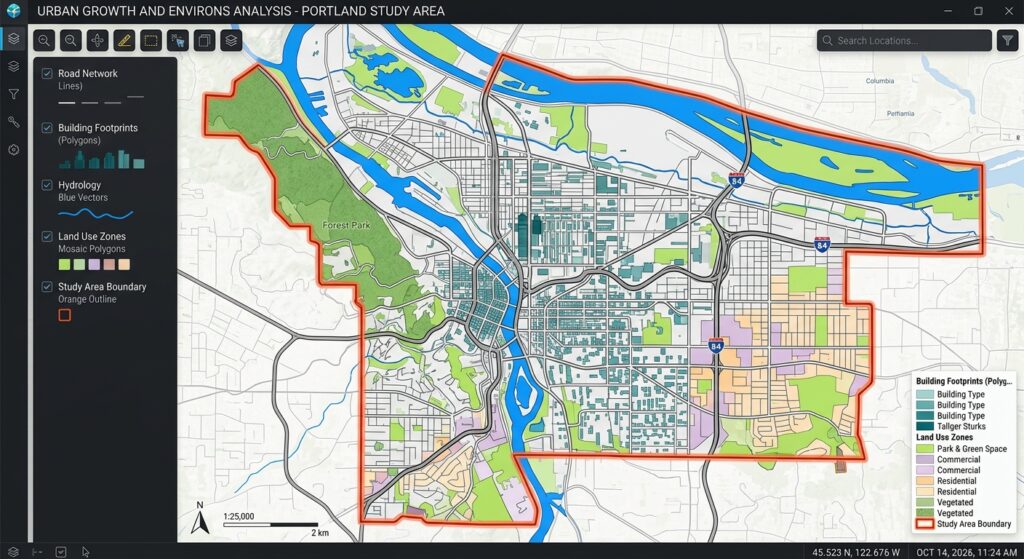
Suppose a university project requires you to clip roads, rivers, settlements, and sampling points to a county boundary.
Instead of running the Clip tool separately for every layer, you can use a loop to process multiple feature classes.
This is a common example of ArcPy batch processing.
The ArcGIS Pro Clip tool extracts the portions of input features that fall within the clip geometry.
Before you run the script
For this example:
Input.gdbcontains the input feature classes and a polygon calledStudyArea.Clipped.gdbis an existing output geodatabase.- The input geodatabase contains feature classes at its top level, not inside feature datasets.
The study area must be a suitable polygon layer for clipping roads, rivers, points, and other vector data.
Python code
import arcpy
import os

# Define input and output locations
input_gdb = r"C:\GIS\StudentProject\Input.gdb"
output_gdb = r"C:\GIS\StudentProject\Clipped.gdb"

# Identify the study area polygon
clip_boundary = os.path.join(input_gdb, "StudyArea")

# Check that the input and output data exist
for path in (input_gdb, output_gdb, clip_boundary):
    if not arcpy.Exists(path):
        raise FileNotFoundError(f"Required data not found: {path}")

# Set the workspace and overwrite option
arcpy.env.workspace = input_gdb
arcpy.env.overwriteOutput = True

# Get all top-level feature classes
feature_classes = arcpy.ListFeatureClasses()

# Process each feature class
for fc in feature_classes:

    # Do not clip the study area using itself
    if fc.lower() == "studyarea":
        continue

    # Build input and output paths
    input_fc = os.path.join(input_gdb, fc)
    output_name = arcpy.ValidateTableName(f"{fc}_clip", output_gdb)
    output_fc = os.path.join(output_gdb, output_name)

    try:
        # Run the Clip tool
        arcpy.analysis.Clip(
            input_fc,
            clip_boundary,
            output_fc
        )

        print(f"Clipped successfully: {fc}")

    except arcpy.ExecuteError:
        print(f"Failed to clip: {fc}")
        print(arcpy.GetMessages(2))
Line-by-line explanation
Lines 1–2 — Import the required modules
arcpy provides the GIS functions. Python’s built-in os module helps assemble file paths without manually combining directory names.
Lines 5–9 — Define the input, output, and clip boundary
The input geodatabase contains your source datasets. The output geodatabase stores the resulting clipped datasets.
os.path.join() constructs the path to the StudyArea feature class.
Lines 12–14 — Validate the paths
The loop checks whether each required geodatabase or dataset exists. This catches common mistakes before the script begins processing.
Lines 17–18 — Configure the environment
The workspace points to the input geodatabase, and the overwrite setting allows existing output datasets to be replaced.
Line 21 — List the feature classes
feature_classes = arcpy.ListFeatureClasses()This returns a Python list of feature class names in the current workspace. In this example, it lists the classes at the top level of Input.gdb.
Lines 24–27 — Loop through the datasets
for fc in feature_classes:
    if fc.lower() == "studyarea":
        continue
The loop handles one feature class at a time. continue skips the StudyArea feature class, preventing the script from clipping the boundary by itself.
Lines 30–32 — Create output paths
The input path identifies the source dataset. arcpy.ValidateTableName() makes the proposed output name valid for the destination workspace.
For example, Roads becomes Roads_clip.
Lines 35–39 — Run Clip
The arcpy.analysis.Clip() function accepts three main arguments: input features, clip features, and output features.
The output retains the portions of each input dataset that fall within the study area.
Lines 42–45 — Handle geoprocessing errors
If an ArcPy geoprocessing operation fails, the exception handler prints the name of the failed dataset and the relevant ArcGIS error messages.
This helps identify individual problem layers without losing the diagnostic information.
Expected result
If the input contains roads, rivers, settlements, and sampling points, you should find outputs such as:
Clipped.gdb
├── Roads_clip
├── Rivers_clip
├── Settlements_clip
└── SamplingPoints_clip
The exact outputs depend on which feature classes exist in your source geodatabase.
Thesis tip: If your data is stored inside feature datasets, use arcpy.da.Walk() to find nested feature classes. You should also check coordinate systems, geometry types, and the existence of suitable output names before processing large datasets.
5. Script 3: Calculating Field Values Automatically
The problem
Imagine you have a polygon dataset containing population totals and area values for several administrative units. Your analysis requires population density in people per square kilometre.
The formula is:
[
\text{Population density} =
\frac{\text{Population}}{\text{Area in km}^2}
]
You could calculate it manually in the attribute table, but ArcPy can apply the calculation to the entire feature class.
Python code
This example assumes the input feature class already contains numeric POPULATION and AREA_KM2 fields.
import arcpy

# Define the input feature class
input_fc = (
    r"C:\GIS\StudentProject\Project.gdb"
    r"\AdministrativeUnits"
)

# Read the existing field names
field_names = {
    field.name.upper()
    for field in arcpy.ListFields(input_fc)
}

# Confirm that the required fields exist
required_fields = {"POPULATION", "AREA_KM2"}
missing_fields = required_fields - field_names

if missing_fields:
    raise ValueError(
        f"Missing required fields: {sorted(missing_fields)}"
    )

# Create the output field if necessary
if "POP_DENS" not in field_names:
    arcpy.management.AddField(
        input_fc,
        "POP_DENS",
        "DOUBLE"
    )

# Define the field calculation
expression = "density(!POPULATION!, !AREA_KM2!)"

code_block = """
def density(population, area):
    if population is None or area in (None, 0):
        return None
    return population / area
"""

# Calculate population density
arcpy.management.CalculateField(
    input_fc,
    "POP_DENS",
    expression,
    "PYTHON3",
    code_block
)

print("Population density calculation completed.")
Line-by-line explanation
Lines 1–5 — Specify the input data
The code identifies the administrative polygon feature class to update.
The adjacent raw strings combine into a single path. You can also write the same path on one line.
Lines 8–11 — Read the field names
arcpy.ListFields() returns information about the fields in the dataset. The set comprehension creates a collection of their names in uppercase, allowing the script to check for the required fields without depending on capitalization.
Lines 14–20 — Check the required fields
The script compares the existing field names with POPULATION and AREA_KM2.
If either field is missing, a ValueError explains the problem before a calculation is attempted.
Lines 23–29 — Create the output field
arcpy.management.AddField() creates POP_DENS as a DOUBLE field if it does not already exist.
A double field stores numeric values with decimal precision, making it suitable for population density.
Lines 32–39 — Define the calculation expression and function
expression = "density(!POPULATION!, !AREA_KM2!)"In an ArcGIS Python field expression, exclamation marks identify field values.
The density() function divides population by area. Before performing the division, it checks whether population is missing or area is missing or zero. If the calculation cannot be made safely, it returns None, which is stored as a null value.
Lines 42–48 — Run Calculate Field
arcpy.management.CalculateField() applies the expression to the POP_DENS field using the Python 3 expression type.
The fifth argument contains the code block that defines the density() function.
Final line — Confirm completion
The message appears after the geoprocessing operation completes successfully.
Important considerations
This example assumes the AREA_KM2 field really contains area in square kilometres and the POPULATION field holds the corresponding population count.
If area has not yet been calculated, calculate it using an appropriate area method and unit. For example, a projected coordinate system with metre units may be suitable for planar area calculations, while geodesic area may be preferable for other study designs.
Warning: Calculate Field modifies the input dataset. Existing values in POP_DENS will be replaced. Back up your data before running the script on important research files.
For official syntax and supported expressions, see Esri’s Calculate Field documentation.
6. Script 4: Exporting Multiple Map Layouts to PDF
The problem
At the end of a GIS assignment, you might have separate layouts for land cover, population distribution, road networks, and other analytical outputs.
Exporting them individually becomes repetitive, especially when a project contains many layouts.
ArcPy’s arcpy.mp module allows you to access ArcGIS Pro projects, retrieve their layouts, and export them programmatically.
This example uses the layout export API documented for ArcGIS Pro 3.4 and later.
Python code
import arcpy
import os

# Define the output folder
output_folder = r"C:\GIS\StudentProject\PDFs"

# Create the folder if it does not exist
os.makedirs(output_folder, exist_ok=True)

# Access the currently open ArcGIS Pro project
project = arcpy.mp.ArcGISProject("CURRENT")

# Retrieve every layout in the project
layouts = project.listLayouts()

if not layouts:
    print("No layouts found in this project.")

# Export each layout to a separate PDF
for layout in layouts:

    # Replace spaces and special characters in filenames
    safe_name = "".join(
        char if char.isalnum() or char in ("_", "-") else "_"
        for char in layout.name
    ).strip("_")

    pdf_path = os.path.join(
        output_folder,
        f"{safe_name}.pdf"
    )

    # Create a PDF export object
    pdf = arcpy.mp.CreateExportFormat("PDF", pdf_path)

    # Set the export resolution
    pdf.resolution = 300

    # Export the complete layout
    layout.export(pdf)

    print(f"Exported: {pdf_path}")
Line-by-line explanation
Lines 1–2 — Import modules
ArcPy provides access to the project and layout objects. The os module handles the output directory and file paths.
Lines 5–8 — Prepare the output directory
os.makedirs() creates the PDF folder if necessary. The exist_ok=True argument prevents an error if the folder already exists.
Line 11 — Reference the open project
project = arcpy.mp.ArcGISProject("CURRENT")"CURRENT" refers to the ArcGIS Pro project open in the application. This is appropriate for the Python Window or a notebook running within ArcGIS Pro.
For a stand-alone script, replace "CURRENT" with the full path to your .aprx project file.
Line 14 — Retrieve the layouts
layouts = project.listLayouts()This returns a list of layout objects in the project.
Lines 16–17 — Check whether layouts exist
The script prints a message if there are no layouts to export. If the list is empty, the export loop has nothing to process.
Lines 20–26 — Generate valid output filenames
The code takes the layout name and replaces spaces and most special characters with underscores.
For example, Population Distribution Map becomes Population_Distribution_Map.pdf.
Lines 28–31 — Build the PDF path
os.path.join() combines the output folder and filename, ensuring that each PDF has a complete destination path.
Lines 34–35 — Create a PDF export object
arcpy.mp.CreateExportFormat() creates a PDF format object with the specified output path.
Line 38 — Set the resolution
A resolution of 300 dots per inch (dpi) is a common choice for print-quality maps, although requirements vary by assignment and publication.
Line 41 — Export the layout
layout.export(pdf) exports the full layout, including the map frame and other layout elements, to the specified PDF.
Final line — Print the result
The message identifies the PDF file that was exported.
What makes this useful?
A single script can export all the layouts in your project in a consistent way. This is especially valuable when preparing multiple figures for a dissertation, fieldwork report, environmental assessment, or planning document.
Before exporting, make sure that your layouts have descriptive names and that their legends, map scales, north arrows, titles, and other elements are positioned correctly.
For version details and further examples, consult Esri’s Layout class documentation.
7. Script 5: Listing All Feature Classes in a Geodatabase
The problem
As a GIS project grows, it becomes difficult to remember every dataset stored in a file geodatabase.
You might inherit a project from another analyst, download a collection of datasets, or need to audit the inputs to a spatial analysis.
Python can list the feature classes automatically, including feature classes inside nested feature datasets.
Python code
import arcpy
import os

# Define the geodatabase
gdb_path = r"C:\GIS\StudentProject\Project.gdb"

# Verify that the geodatabase exists
if not arcpy.Exists(gdb_path):
    raise FileNotFoundError(f"Geodatabase not found: {gdb_path}")

# Keep track of the number of feature classes
feature_class_count = 0

# Search the geodatabase recursively
for dirpath, dirnames, feature_classes in arcpy.da.Walk(
    gdb_path,
    datatype="FeatureClass"
):

    # Process every feature class found
    for fc in feature_classes:
        full_path = os.path.join(dirpath, fc)

        # Retrieve its geometry type
        geometry_type = arcpy.Describe(full_path).shapeType

        print(f"{full_path} | Geometry: {geometry_type}")

        feature_class_count += 1

# Display the total
print(f"Total feature classes: {feature_class_count}")
Line-by-line explanation
Lines 1–2 — Import ArcPy and the operating system module
These modules allow the script to inspect GIS datasets and construct complete file paths.
Line 5 — Define the geodatabase
The variable identifies the geodatabase that you want to inventory.
Lines 8–9 — Verify the path
If the geodatabase does not exist, the script stops before attempting to search it.
Line 12 — Initialize a counter
feature_class_count begins at zero. The script increments it every time a feature class is found.
Lines 15–18 — Walk through the geodatabase
for dirpath, dirnames, feature_classes in arcpy.da.Walk(
    gdb_path,
    datatype="FeatureClass"
):
arcpy.da.Walk() explores the workspace recursively. Its results include the current location, directory names, and the names of datasets that match the requested data type.
The datatype="FeatureClass" argument limits the search to feature classes.
This is useful when your geodatabase contains feature datasets in addition to feature classes at the top level.
Lines 21–22 — Build each complete dataset path
The inner loop processes every feature class returned by the current search location.
os.path.join() combines the current location and the feature class name to form the full path.
Line 25 — Identify the geometry type
arcpy.Describe(full_path).shapeType returns the feature class’s geometry type, such as Polygon, Polyline, or Point.
Lines 27–29 — Print the information and update the count
The output displays the full path and geometry type. The counter increases by one after each feature class.
Final line — Report the total
The final message tells you how many feature classes the script found.
Example output
C:\GIS\StudentProject\Project.gdb\Roads | Geometry: Polyline
C:\GIS\StudentProject\Project.gdb\Rivers | Geometry: Polyline
C:\GIS\StudentProject\Project.gdb\AdministrativeUnits | Geometry: Polygon
C:\GIS\StudentProject\Project.gdb\SamplingPoints | Geometry: Point

Total feature classes: 4
Your actual output depends on the contents of the geodatabase.
How can you extend this script?
You could export the dataset inventory to CSV, check coordinate systems, record feature counts, or identify datasets that need further processing.
Esri also provides arcpy.ListFeatureClasses() for listing feature classes in a specified workspace. That function is convenient for simple inventories, while arcpy.da.Walk() is useful when you need to find feature classes throughout a nested geodatabase structure.
For more information, see the ListFeatureClasses documentation.
8. Three Debugging Tips for Python Beginners in ArcGIS Pro
Your first scripts will not always run successfully. Debugging is a normal part of programming, and learning to diagnose problems is just as important as learning ArcPy functions.
Tip 1: Check paths, dataset names, and fields before processing
Many early errors result from incorrect paths, misspelled feature class names, or missing attribute fields.
Before running a large operation, test the input:
import arcpy

input_fc = r"C:\GIS\StudentProject\Project.gdb\Roads"

if arcpy.Exists(input_fc):
    print("Input dataset found.")
    print("Feature count:", arcpy.management.GetCount(input_fc)[0])
else:
    print("Check the path and dataset name.")
If the dataset exists but the tool fails, inspect its geometry type, coordinate system, and required fields.
Also check whether another ArcGIS Pro session is locking the data, or whether your account has permission to write to the output location.
Tip 2: Read the actual geoprocessing error
A failed tool often produces a useful ArcGIS error message.
Use a try and except block to display it:
import arcpy

try:
    arcpy.analysis.Clip(
        r"C:\GIS\StudentProject\Input.gdb\Roads",
        r"C:\GIS\StudentProject\Input.gdb\StudyArea",
        r"C:\GIS\StudentProject\Clipped.gdb\Roads_clip"
    )

except arcpy.ExecuteError:
    print(arcpy.GetMessages(2))
arcpy.GetMessages(2) returns error messages from the most recent geoprocessing operation. These can help identify invalid parameters, incompatible inputs, permission problems, or other processing failures.
Read the message carefully instead of repeatedly rerunning the same code.
Tip 3: Test small, then scale up
Do not begin your first batch-processing experiment with 500 datasets.
Start by processing one feature class and confirming that the output is correct. Then add a loop for a few datasets before scaling to the complete project.
Print useful checkpoints:
print("Starting analysis...")

# Run your geoprocessing operation here

print("Analysis completed.")
For batch jobs, report each dataset’s success or failure so you can identify problems without losing track of progress.
When code behaves unexpectedly, isolate the smallest section that reproduces the error. This makes debugging easier and encourages a more systematic approach to problem-solving.
9. Conclusion: From Manual GIS to Spatial Programming
Learning ArcPy for beginners is about changing how you approach GIS work.
Instead of treating every geoprocessing operation as an independent task, you begin thinking in terms of reusable instructions, repeatable workflows, and automated checks.
The five scripts in this tutorial introduce foundational skills:
| Script | Skill learned | Practical application |
|---|---|---|
| 1. Workspace settings | Configure ArcPy environments | Prepare projects for repeatable processing |
| 2. Batch clipping | Use loops and geoprocessing tools | Process multiple vector datasets |
| 3. Field calculation | Automate attribute calculations | Calculate population density and similar indicators |
| 4. PDF export | Access project layouts | Prepare thesis and report maps |
| 5. Geodatabase inventory | Explore GIS data programmatically | Audit and document datasets |
These examples are starting points, not a complete replacement for quality control or methodological judgment. A script can run without errors and still produce results that are unsuitable for your research. Always verify outputs, coordinate systems, units, assumptions, and calculations.
Your next step
Choose one script and adapt it to a small dataset from a class assignment or personal GIS project. Change the input path, run the script, inspect the output, and document what you learned.
Once these patterns become familiar, you can move toward more advanced workflows such as automating raster analysis, building custom geoprocessing tools, processing remote sensing imagery, and creating reusable GIS scripts for larger projects.
The goal is not just to write Python. It is to use programming to make your GIS work more efficient, consistent, and reproducible.