
Automating Map Export Loops with ArcPy and PyQGIS
GIS Coding Tutorial · Python Automation · ArcGIS Pro · QGIS
Introduction
Imagine you have 50 administrative districts, and each district requires its own map showing boundaries, roads, settlements, a north arrow, a scale bar, a legend, and a descriptive title. When dealing with dozens of administrative districts, learning Automating Map Export Loops with ArcPy and PyQGIS becomes essential for efficient spatial data processing.
This is where Automate Map Export Loop ArcPy PyQGIS workflows become useful. Python allows you to iterate through spatial features, adjust map extents, update map titles or filters, and export each map automatically.
Instead of repeating the same operation 50 times, you define the workflow once and let the script handle every district. When working with enterprise spatial geodatabases, Automating Map Export Loops with ArcPy and PyQGIS ensures your multi-district map production runs without manual bottlenecks.

This tutorial demonstrates two approaches:
-
ArcPy with ArcGIS Pro: Open an existing project, loop through administrative features, update a layer’s definition query and map extent, and export individual PDF or PNG files.
-
PyQGIS with QGIS: Create a print layout programmatically, loop through vector features, adjust the layout map item to each feature’s extent, and export each map.
Both workflows reuse a single layout structure to maintain consistent map design across the entire batch.
What you need before starting
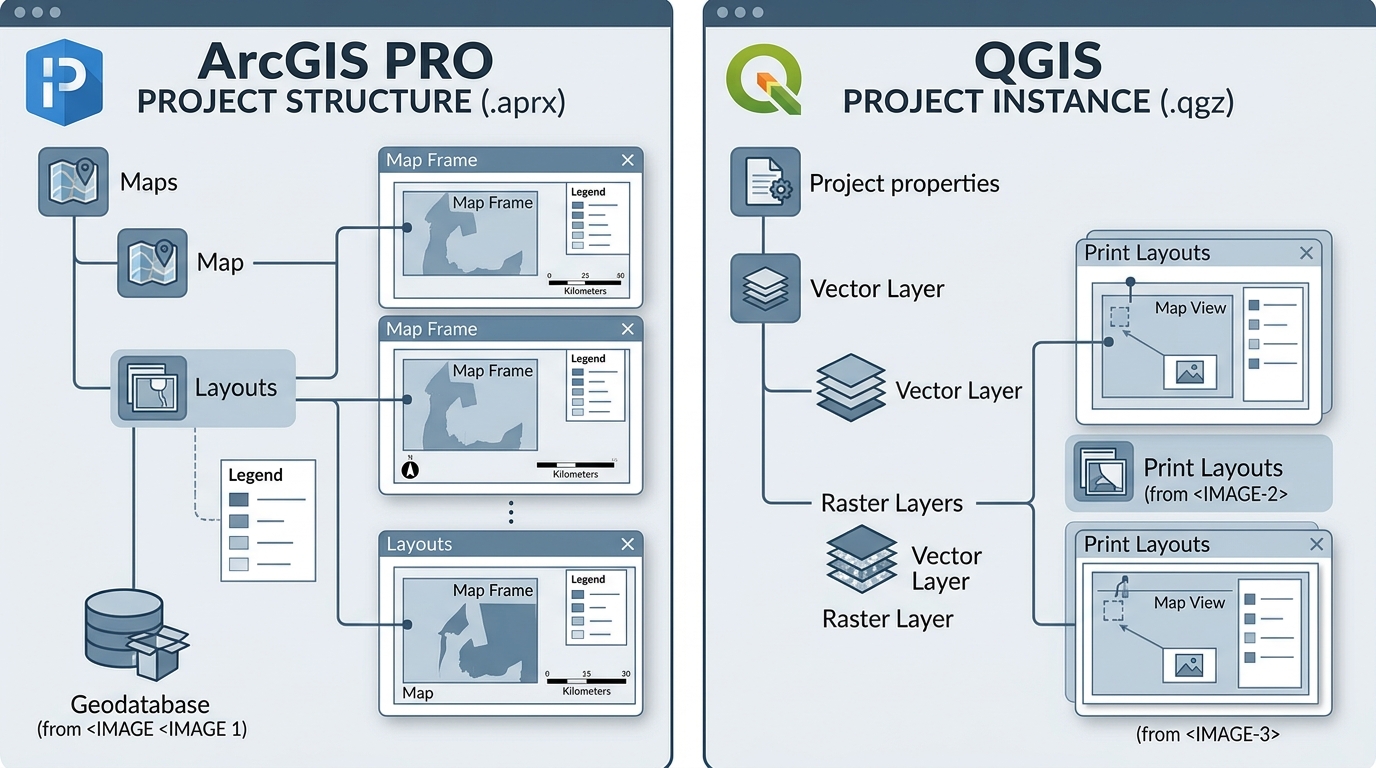
For the ArcGIS Pro workflow, prepare an .aprx project containing a map, a district polygon layer, and a layout with a map frame and title element.
For the QGIS workflow, prepare a project with a valid district polygon layer and the contextual map layers you want to appear in each export.
The examples use the following assumed fields and names. Replace them with the names in your own project.
| Setting | Example |
|---|---|
| District layer | Districts |
| Unique district key | DISTRICT_ID |
| District name field | DISTRICT_NAME |
| Map layout | District Layout |
| Output format | PDF or PNG |
| Export resolution | 300 DPI |
Important distinction: ArcGIS Pro’s native Map Series and QGIS’s Atlas can already produce one page per spatial feature. Use those when your layouts follow a standard feature-driven workflow. Custom Python loops are especially useful when you need additional logic, custom filenames, extra processing, feature-specific settings, or bespoke export behavior.
Section 1: ArcPy map export loop in ArcGIS Pro
ArcPy’s arcpy.mp module provides access to ArcGIS Pro projects, maps, layers, layouts, map frames, and export functions. You can use it to automate operations that would otherwise require repeated manual interaction with the interface.
Step 1: Understand the project structure
Before writing code, open your ArcGIS Pro project and confirm that it contains these elements:
-
A map named
District Map. -
A district polygon layer named
Districts. -
A layout named
District Layout. -
A map frame named
District Map Frame. -
A text element named
Title.
To inspect or rename layout elements, open the layout and select each item. Use the Element pane to give important elements distinct names.
The Python script will reference these names, so they must match the project exactly.
Step 2: Access the ArcGIS Pro project and layout
The first step is to load the project and obtain references to the map, layer, layout, map frame, and title.
import arcpyimport osimport re# Path to the existing ArcGIS Pro project.APRX_PATH = r"C:\GIS\DistrictProject.aprx"# Names of the map, layer, layout, and layout elements.MAP_NAME = "District Map"LAYER_NAME = "Districts"LAYOUT_NAME = "District Layout"MAP_FRAME_NAME = "District Map Frame"TITLE_ELEMENT_NAME = "Title"# Open the ArcGIS Pro project.aprx = arcpy.mp.ArcGISProject(APRX_PATH)# Retrieve the map by its project name.map_obj = aprx.listMaps(MAP_NAME)[0]# Retrieve the district layer from that map.district_layer = next( layer for layer in map_obj.listLayers() if layer.name == LAYER_NAME)# Retrieve the map layout.layout = aprx.listLayouts(LAYOUT_NAME)[0]# Retrieve the map frame inside the layout.map_frame = layout.listElements( "MAPFRAME_ELEMENT", MAP_FRAME_NAME)[0]# Retrieve the text element used for the map title.How it works:
arcpy.mp.ArcGISProject() opens the existing project file. The listMaps(), listLayouts(), and listElements() methods retrieve the project components needed for automation.
The next() expression retrieves the first matching layer from the map. If you have multiple layers with the same name, use a more specific layer-selection rule.
ArcGIS Pro also supports arcpy.mp.ArcGISProject("CURRENT") when running the script in the Python window or notebook inside the open application.
Step 3: Configure the batch export parameters
Next, define the input feature class, fields, output directory, and file formats.
# Path to the district polygon feature class.DISTRICT_FEATURES = r"C:\GIS\Data\Districts.gdb\Districts"# Field containing a unique identifier for each district.ID_FIELD = "DISTRICT_ID"# Field containing the district's descriptive name.NAME_FIELD = "DISTRICT_NAME"# Directory where exported map files will be saved.OUTPUT_DIR = r"C:\GIS\Exports"# Export settings.DPI = 300EXPORT_PDF = TrueEXPORT_PNG = True# Create the output directory if it does not exist.os.makedirs(OUTPUT_DIR, exist_ok=True)# Define a helper function for safe output filenames.def safe_filename(value): # Replace invalid or inconvenient filename characters. cleaned = re.sub(r"[^A-Za-z0-9_-]+", "_", str(value)) # Remove unwanted separators from the beginning and end. cleaned = cleaned.strip("_-.") # Return a fallback name if the value is empty. return cleaned[:80] or "district"Why use a helper function?
District names may contain spaces, slashes, punctuation, or other characters that are unsuitable for filenames. The helper creates predictable filenames without changing the district names stored in the data.
The unique district ID will also be included in the output filename to reduce the risk of collisions between similar names.
Step 4: Loop through the district features
This is the core of the automation workflow.
For each district, the script will:
-
Read the district ID, name, and geometry.
-
Construct an SQL expression for the layer’s definition query.
-
Update the layout title.
-
Project the district geometry to the map’s coordinate system if required.
-
Set the map frame extent.
-
Export the layout as PDF and/or PNG.
ArcGIS Pro supports changing a feature layer’s definitionQuery, adjusting a map frame’s camera extent, and exporting a layout through arcpy.mp.
Complete ArcPy export loop
The following script extends the setup above. It exports one file per district and restores the original definition query and title after the batch finishes.
# Store the layer's original definition query for restoration.original_query = district_layer.definitionQuery or ""# Store the original title text so the project can be restored.original_title = title_element.text# Identify the map coordinate system.target_sr = map_obj.spatialReference# Count successful and failed district exports.success_count = 0failure_count = 0try: # Read the source feature class rather than the filtered map layer. # This keeps the cursor independent of changing definition queries. with arcpy.da.SearchCursor( DISTRICT_FEATURES, [ID_FIELD, NAME_FIELD, "SHAPE@"] ) as cursor: # Process each district record. for district_id, district_name, geometry in cursor: try: # Skip records without a usable identifier or geometry. if district_id is None or geometry is None: print("Skipping a record with missing ID or geometry.") continue # Use the ID as a fallback when the name is missing. name_for_map = ( str(district_name) if district_name not in (None, "") else str(district_id) )Understanding the important operations
Updating the definition query
The line:
district_layer.definitionQuery = district_clausefilters the district layer to the current feature. This is useful for keeping the map focused on the district being exported.
For example, a district with ID D014 might use:
DISTRICT_ID = 'D014'The script accounts for text IDs and numeric IDs, because text comparisons require quotation marks. It also preserves any original filter condition.
If the project contains multiple saved definition queries or an advanced filtering setup, test the query behavior before running the entire batch. Some projects may need a dedicated layer or a native Map Series rather than repeatedly changing a heavily configured layer.
Updating the map extent
The following line uses the current polygon geometry to position the map:
map_frame.camera.setExtent(geometry.extent)The extent is recalculated for each district. Multiplying the scale by 1.10 adds a little breathing room around the feature.
Very narrow, long, or highly irregular districts may need a custom extent-padding function or scale rules to ensure consistent framing.
Exporting high-resolution files
The script uses ArcGIS Pro’s export format objects and layout.export(). The PDF and PNG exports are set to 300 DPI.
PDF is suitable for printable maps and preserves vector content where possible. PNG is useful for websites, reports, and image-based publishing. For most cartographic deliverables, 300 DPI is a reasonable starting point, though the final resolution should reflect the intended page size and output use.
Important coordinate-system note: The script projects district geometries into the map’s spatial reference when their CRS names differ. If the datasets use different datums, supply an appropriate geographic transformation rather than relying on an unsuitable default.
An alternative: ArcGIS Pro Map Series
If your layout already has a spatial Map Series configured, you may not need to manually update each extent or definition query. The map series automatically moves through index features and can update dynamic layout elements.
For example, to export a configured Map Series to a single PDF:
import arcpyimport os# Open the project and retrieve the configured layout.aprx = arcpy.mp.ArcGISProject( r"C:\GIS\DistrictProject.aprx")layout = aprx.listLayouts("District Layout")[0]# Retrieve the existing spatial map series.map_series = layout.mapSeries# Check that the map series exists and is enabled.if map_series and map_series.enabled: # Define the output PDF path. output_pdf = os.path.join( r"C:\GIS\Exports", "All_Districts.pdf" ) # Create the PDF format and set the resolution. pdf = arcpy.mp.CreateExportFormat("PDF", output_pdf) pdf.resolution = 300 # Export all map series pages into one document. map_series.export(pdf) print("Map Series exported:", output_pdf)else: print("No enabled Map Series found.")The Map Series must be authored and enabled in the layout before this script runs. Current ArcGIS Pro documentation supports Map Series exports to PDF, PNG, JPEG, and TIFF using export format objects.
Use the custom loop when you specifically need individual per-feature processing or bespoke export behavior; use Map Series when the objective is simply to produce one consistent page per index feature.
Section 2: PyQGIS map layout loop in QGIS
PyQGIS provides access to QGIS projects, vector features, print layouts, map items, and export settings. The essential classes for this workflow are:
| PyQGIS class | Purpose |
|---|---|
QgsProject |
Access the current QGIS project |
QgsPrintLayout |
Create a printable map layout |
QgsLayoutItemMap |
Control the map frame and its extent |
QgsLayoutItemLabel |
Update the map title |
QgsLayoutExporter |
Export the layout as PDF or an image |
QgsCoordinateTransform |
Transform feature geometry into the map CRS |
The export process is similar to ArcPy, but the object model is different. In QGIS, the extent must be set on the layout’s map item to control the map being exported. Changing only the live map canvas extent does not necessarily update an existing layout map item.
Step 1: Open the QGIS Python Console
-
Open your QGIS project.
-
Load the district polygon layer and any contextual layers you want to display.
-
Confirm that the project and district layer use valid coordinate reference systems.
-
Open Plugins → Python Console. In versions where the menu differs, look for the Python Console command under the plugin or View menus.
-
Paste and run the following script in the console.
This example creates a new A4 landscape layout and prepares it for batch exporting.
Step 2: Initialize the project, layout, and map frame
import osimport re# Import QGIS classes for projects, layouts, maps, and exporting.from qgis.core import ( QgsProject, QgsPrintLayout, QgsLayoutItemMap, QgsLayoutItemLabel, QgsLayoutPoint, QgsLayoutSize, QgsLayoutItemPage, QgsLayoutExporter, QgsCoordinateTransform, QgsGeometry, QgsRectangle)# Import Qt classes for title styling and alignment.from qgis.PyQt.QtGui import QFontfrom qgis.PyQt.QtCore import Qt# Access the currently open QGIS project.project = QgsProject.instance()# Define the name of the district layer.DISTRICT_LAYER_NAME = "Districts"# Define the fields used for map titles and filenames.ID_FIELD = "DISTRICT_ID"NAME_FIELD = "DISTRICT_NAME"# Define the destination folder for exported maps.OUTPUT_DIR = r"C:\GIS\QGIS_Exports"# Set the desired image and PDF resolution.The map frame and title are created once. The export loop will update the title and extent without rebuilding the page.
The script intentionally uses the currently visible map-canvas layers for the map item. Make sure the district layer and the intended context layers are visible when you run it. If your project needs a fixed layer set independent of the canvas, specify the desired layers explicitly.
Step 3: Iterate through the district features
Next, create the loop that processes every polygon.
Each iteration will:
-
Read one feature and its attributes.
-
Copy and transform the geometry into the project CRS.
-
Compute an expanded bounding rectangle.
-
Set the layout map item’s extent.
-
Update the title.
-
Export the result to a separate file.
QGIS’s zoomToExtent() is useful for this task because it fits the requested rectangle inside the existing map frame without changing the frame’s physical dimensions.
Complete PyQGIS export loop
Run this code after the initialization script above.
# Create a coordinate transform from the district layer CRS# to the layout map item's CRS.transform = QgsCoordinateTransform( districts.crs(), project.crs(), project)# Prepare the PDF exporter settings.pdf_settings = QgsLayoutExporter.PdfExportSettings()pdf_settings.dpi = DPI# Prepare the raster image exporter settings.image_settings = QgsLayoutExporter.ImageExportSettings()image_settings.dpi = DPI# Create one exporter for the existing layout.exporter = QgsLayoutExporter(layout)# Initialize counters for the batch.success_count = 0failure_count = 0# Loop through the district features.for feature in districts.getFeatures(): try: # Read the district ID and name attributes. district_id = feature[ID_FIELD] district_name = feature[NAME_FIELD] # Use the provider feature ID if the stored ID is missing. if district_id is None or str(district_id) == "": district_id = feature.id() # Fall back to the ID if the district name is empty.This workflow creates a PDF and PNG for each valid district feature when both export options are enabled. QgsLayoutExporter supports both output types and reports a result code that can be checked to detect failed exports.
Optional: Show only the current district
The example changes the map extent but retains the selected project layers. Consequently, neighbouring district boundaries may remain visible, which is often desirable for context.
If each map must display only the current district polygon, consider using a dedicated highlight layer, a controlled layer subset, or a QGIS Atlas configuration. If using a subset filter, save the original subset expression and restore it after the batch. Avoid changing the source layer’s filter before the feature loop is complete if doing so could affect which features are returned.
Optional: Export PDF only
For a PDF-only workflow, set:
EXPORT_PDF = TrueEXPORT_PNG = FalseFor PNG-only output:
EXPORT_PDF = FalseEXPORT_PNG = TrueThis avoids producing duplicate deliverables when only one format is required.
Section 3: Debugging and performance optimization
A script that works for three districts may still encounter problems when processing hundreds of features. The best way to make batch export reliable is to anticipate errors and avoid unnecessary operations inside the loop. Setting up automated error handling is a crucial best practice when Automating Map Export Loops with ArcPy and PyQGIS across hundreds of features.
1. Use predictable file naming conventions
Avoid naming every output map.pdf. Each feature should have a stable, unique filename, such as:
Exports/
├── Central_001.pdf
├── Central_001.png
├── Eastern_002.pdf
├── Eastern_002.png
├── Northern_003.pdf
└── Northern_003.png
The examples above combine a sanitized district name and ID. This helps prevent files from being overwritten when two districts have similar names.
Keep a record of the output files and failed features if the exports are part of a formal reporting pipeline.
2. Handle failed exports without stopping the batch
A single feature can fail because of invalid geometry, missing attributes, broken data sources, or export errors.
Use a try/except block inside the feature loop so one failure does not terminate all remaining exports. The complete scripts above demonstrate this pattern.
For production workflows, consider writing errors to a log file with the feature ID, time, output filename, and error message rather than relying only on console output.
3. Avoid unnecessary layout creation
Proper error handling ensures that Automating Map Export Loops with ArcPy and PyQGIS runs smoothly from start to finish. A common performance mistake is rebuilding the entire layout for every district.
Instead:
-
Create one layout and map frame before the loop.
-
Reuse the same layout and exporter objects.
-
Update only the title, definition query, extent, and other properties that change.
-
Read the spatial data once where practical.
-
Avoid repeatedly opening the same project file inside the loop.
The scripts above reuse their layouts. This reduces unnecessary object creation and makes the output more consistent.
4. Manage memory and large batches
Exporting many high-resolution images can consume substantial memory and disk space. However, the loop itself is not automatically a memory leak; repeated allocation of unnecessary objects and retaining large references can be the problem.
ArcPy tips
-
Use
with arcpy.da.SearchCursor(...)so the cursor is closed automatically. -
Reuse the existing project, layout, and map-frame objects.
-
Avoid loading all feature geometries into a Python list when a cursor can process them sequentially.
-
Close references to temporary objects when they are no longer needed, particularly in large or long-running scripts.
-
If exporting hundreds or thousands of maps, monitor memory and test the process in batches.
PyQGIS tips
-
Reuse the same
QgsPrintLayout,QgsLayoutItemMap, andQgsLayoutExporter. -
Prefer streaming features through
getFeatures()instead of building large feature lists unnecessarily. -
Keep export settings outside the loop when they are identical for every map.
-
Avoid creating and deleting dozens of layouts when a single reusable layout is sufficient.
-
Do not force garbage collection after every feature unless profiling shows a specific need.
5. Check the coordinate reference system and map extent
Extent problems are among the most common reasons for maps that export incorrectly.
A district may be displayed in the wrong part of the layout if its geometry coordinates are not in the same CRS as the map frame.
Before a batch export, verify that:
-
The input layer has a valid CRS.
-
The feature geometry is transformed into the intended map CRS.
-
Extents have sensible dimensions.
-
The map scale and margins work for both large and small polygons.
-
The layout displays the intended layers and their correct visibility.
For geographically dispersed or unusually shaped districts, a fixed 10% extent margin may not be ideal. You can implement minimum scale limits, custom padding, or district-specific map framing rules.
6. Test before exporting everything
Start with three to five representative features: one large district, one small district, and one irregularly shaped district.
Check that each output has the correct title, extent, legend, scale bar, coordinate system, and filename. Inspect both PDF and PNG exports at the intended resolution before processing the full dataset.
A short test run can reveal issues that would otherwise be repeated across dozens of output files.
Section 4: ArcPy vs. PyQGIS — which workflow should you use?
| Requirement | ArcPy | PyQGIS |
|---|---|---|
| Access existing project | arcpy.mp.ArcGISProject() |
QgsProject.instance() |
| Filter a feature layer | definitionQuery |
Layer subset or other filtering |
| Set map extent | map_frame.camera.setExtent() |
map_item.zoomToExtent() |
| Update title | Layout text element’s text property |
QgsLayoutItemLabel.setText() |
| Export PDF | layout.export() |
QgsLayoutExporter.exportToPdf() |
| Export PNG | layout.export() |
QgsLayoutExporter.exportToImage() |
| Native page-per-feature workflow | Map Series | Atlas |
| Main advantage | Integration with ArcGIS Pro projects | Flexible open-source GIS automation |
The choice depends on the software and project you already use. ArcPy is particularly convenient when the maps depend on an established ArcGIS Pro layout. PyQGIS is useful for projects built around QGIS layers, print layouts, and open-source data workflows.
Conclusion: Mastering Automating Map Export Loops with ArcPy and PyQGIS
Automating map exports with Python turns repetitive cartographic production into a repeatable GIS workflow. Instead of manually zooming to 50 administrative districts, updating each title, and exporting every page, you can define those operations once and apply them to every feature.
The essential pattern is:
Access the project → retrieve the layout → iterate through spatial features → update the filter and extent → export the map → record the result.
For ArcGIS Pro, this can be done with arcpy.mp, layer definition queries, map-frame cameras, and export format objects. For QGIS, it can be done with QgsPrintLayout, QgsLayoutItemMap, and QgsLayoutExporter.
For straightforward page-per-feature jobs, consider the native ArcGIS Pro Map Series or QGIS Atlas before implementing a custom loop. For specialized export rules, dynamic filtering, or additional per-district processing, custom scripts provide more control.
The result is not simply faster exporting. It is a reproducible cartographic production pipeline in which every map follows the same layout standards, filenames are predictable, and failures can be identified and corrected systematically. Ultimately, mastering Automating Map Export Loops with ArcPy and PyQGIS saves countless hours of manual cartographic work.
Official documentation
-
ArcGIS Pro — ArcPy Mapping module for project, layout, map frame, and export APIs.
-
ArcGIS Pro — Map Series for native feature-driven layout exports.
-
QGIS — QgsLayoutItemMap API for map frame extents and layer control.
-
QGIS — QgsLayoutExporter API for PDF and image export settings and return codes.