
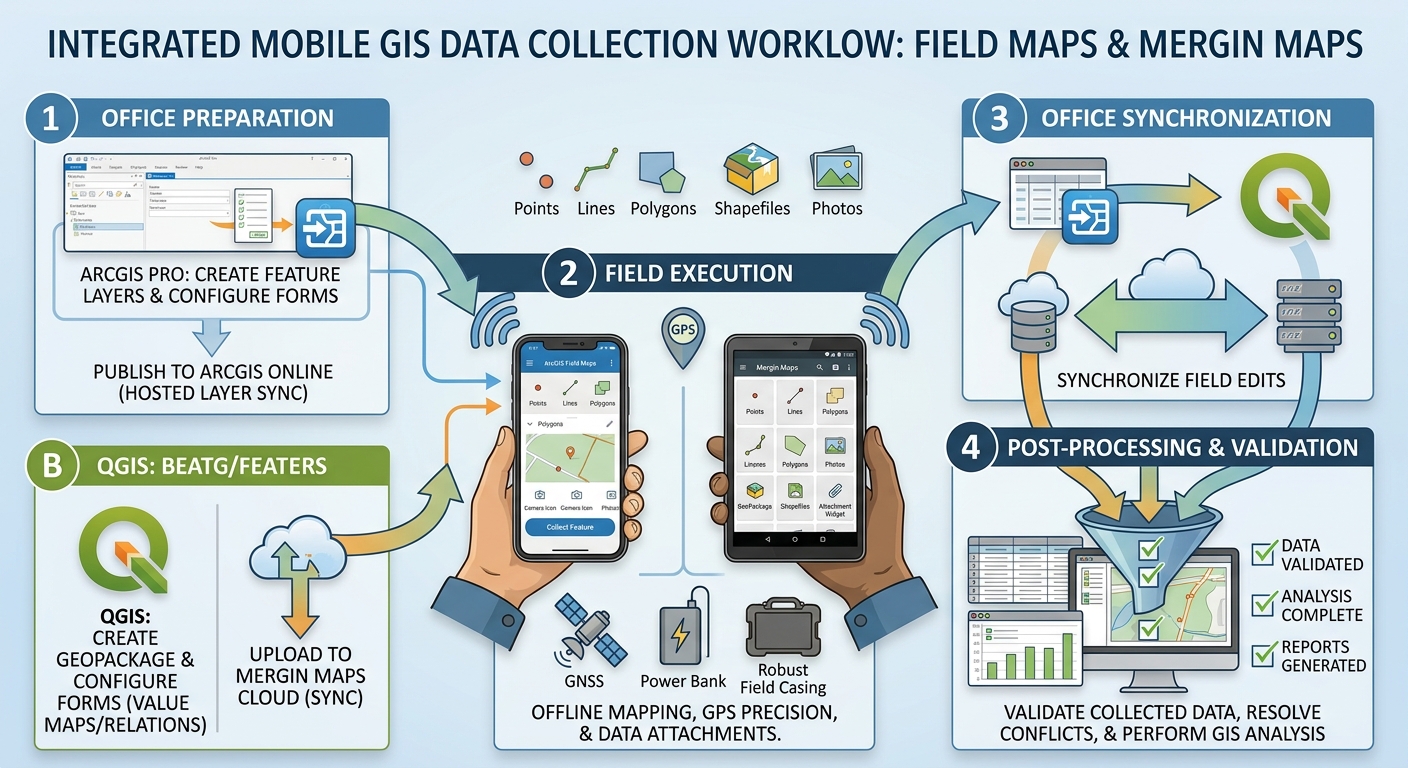
GIS Field Data Collection: Step-by-Step Guide with Field Maps & Mergin Maps
1. Introduction: From Paper Forms to Mobile GIS
Imagine conducting a field survey to map Mastering GIS Field Data Collection Field Maps Mergin Maps workflows is essential for capturing accurate spatial data during field surveys. water points, inspect roads, record tree species, or document damaged infrastructure. Traditionally, a field team might record observations on paper, capture coordinates using a handheld GPS receiver, take photographs separately, and manually transfer everything into a GIS database.
This process works, but it creates opportunities for errors. Coordinates may be transcribed incorrectly, photographs may become separated from their records, and survey forms may contain inconsistent descriptions.
Mobile GIS field data collection brings maps, digital forms, GPS positioning, photographs, and spatial databases together in one workflow.
Using a smartphone or tablet, field teams can capture geographic features, complete standardized forms, attach photographs, and synchronize their observations with a central project when a network connection is available.
Two popular approaches are ArcGIS Field Maps, for users working in the Esri ecosystem, and Mergin Maps, for users working with QGIS and open-source GIS tools.
Both support offline fieldwork, although their data management and synchronization workflows differ.
This tutorial follows a hypothetical environmental field survey in which a team maps water points, records their condition, and attaches photographs. The same principles apply to tree inventories, road inspections, biodiversity surveys, and infrastructure mapping.
2. Key Tools Overview
Before setting up your project, choose the mobile GIS platform that matches your existing software, data infrastructure, budget, and team requirements.
ArcGIS Field Maps: For the Esri ecosystem
ArcGIS Field Maps is a mobile application for viewing maps, collecting geographic features, completing inspection forms, and editing supported GIS layers.
It integrates with ArcGIS Online and ArcGIS Enterprise, allowing organizations to prepare editable layers, configure forms, manage user access, and synchronize data collected in the field.
Typical capabilities include:
- Collecting point, line, and polygon features using GPS.
- Filling out attribute forms with text fields, choice lists, and required values.
- Attaching photographs and other supported media.
- Downloading maps for offline collection.
- Synchronizing field edits with hosted or supported enterprise feature layers.
Official documentation: ArcGIS Field Maps.
Mergin Maps: For QGIS and open-source GIS
Mergin Maps connects desktop QGIS projects with a mobile field data collection application and Mergin Maps Cloud for synchronization.
The desktop project can include vector layers, background maps, symbology, attribute forms, constraints, and other supported QGIS project settings.
Typical capabilities include:
- Collecting and editing spatial data in a mobile application.
- Configuring form widgets directly in QGIS.
- Working offline using a locally stored project.
- Adding photographs and other supported attachments.
- Synchronizing changes between mobile devices and desktop QGIS through Mergin Maps Cloud.
Official documentation: Mergin Maps.
How does QField compare with Mergin Maps?
QField is another mobile application designed for working with QGIS projects. It can work with local project files and can integrate with QFieldCloud for project distribution and synchronization.
Mergin Maps and QField share many concepts because both build on QGIS-based workflows, but they are different mobile applications with different cloud synchronization systems.
| Feature | ArcGIS Field Maps | Mergin Maps | QField |
|---|---|---|---|
| Desktop GIS | ArcGIS Pro and ArcGIS Online workflows | QGIS | QGIS |
| Cloud ecosystem | ArcGIS Online or ArcGIS Enterprise | Mergin Maps Cloud | QFieldCloud, where used |
| Form configuration | Field Maps Designer and layer schema | QGIS attribute form widgets | QGIS attribute form widgets |
| Offline collection | Supported with appropriately prepared maps and layers | Supported with downloaded projects | Supported with local or cloud-prepared projects |
| Photo collection | Feature-layer attachments and supported form elements | Attachment widgets and project-managed media | Attachment widgets and project-managed media |
| Best starting point | Teams already using Esri services | Teams wanting a managed QGIS-to-field synchronization workflow | Teams wanting mobile QGIS projects with flexible local or cloud workflows |
For a QGIS project, choose Mergin Maps when its managed synchronization workflow fits your team, or QField when its local-project and QFieldCloud options better meet your needs.
Useful references: Mergin Maps synchronization, QField documentation, and QFieldCloud synchronization tutorial.
Part 1: Office Setup
The office setup stage is where most field survey problems can be prevented. Before anyone visits the study area, prepare the data structure, forms, map, permissions, and offline workflow.
Step 1: Design the Data Schema and Attribute Domains
A data schema defines how the information collected in the field is stored. It specifies the geometry type, attribute fields, field types, and valid values.
For the water-point survey, the objective is to record each water point’s location, type, operational condition, inspection date, and supporting photograph.
1.1 Choose the geometry type
Decide how each observation should be represented:
- Point: Individual water points, trees, boreholes, or damaged streetlights.
- Line: Rivers, trails, pipelines, or road-condition segments.
- Polygon: Wetlands, forest plots, land parcels, or surveyed boundaries.
For this example, use a point layer called Water_Points.
1.2 Design the attribute table
A practical schema might contain the following fields.
| Field name | Data type | Example value | Purpose |
|---|---|---|---|
site_id |
Text or UUID | WP-0001 |
Unique identifier |
site_type |
Text with coded values | Borehole |
Classifies the water point |
condition |
Text with coded values | Functional |
Records its operational condition |
visit_date |
Date | 2026-10-12 |
Records the inspection date |
water_present |
Boolean or coded value | Yes |
Records the observed water status |
notes |
Text | Minor damage to casing |
Records additional information |
collector |
Text | Survey Team A |
Identifies the collector or team |
Geometry stores the location separately from these attributes.
The photograph should be configured as an attachment or supported media field using the mechanism required by your platform, rather than relying on a manually typed filename with no associated file.
Data-quality rule: Give each observation a stable unique identifier. A unique site_id helps you identify records, check duplicates, and resolve synchronization problems. Use a supported UUID or other unique identifier strategy when working with related records or multi-user projects.
1.3 Configure coded values and choice lists
Field teams should not have to guess how to spell repeated categories.
For example, without a controlled list, the condition field might contain Functional, functional, Working, and Operational. These may describe the same condition but become four separate categories in later analysis.
Instead, define an approved list:
Site type
- Borehole
- Protected spring
- Water kiosk
- Surface-water point
- Other
Condition
- Functional
- Partially functional
- Non-functional
- Not assessed
Water present
- Yes
- No
- Not assessed
The available values are determined by the survey’s data model. Do not include categories the team cannot reliably distinguish in the field.
ArcGIS Pro setup
-
Open your project and create a point feature class using Catalog → Databases → New File Geodatabase if you do not already have a suitable database.
-
Create or select the feature class and open its Fields view.
-
Add the required fields with appropriate data types and lengths.
-
Open the geodatabase’s Domains properties and create coded-value domains for fields such as
site_typeandcondition. -
Assign the relevant domains to the corresponding fields.
-
Configure attachments if photographs will be stored with the features.
The domain values should be established in the data schema before publishing the layer. See Esri’s Prepare an editable layer guide.
QGIS setup
-
Open QGIS and create a project.
-
Create a GeoPackage using Layer → Create Layer → New GeoPackage Layer or the equivalent interface in your QGIS version.
-
Choose the geometry type and coordinate reference system.
-
Add the required fields and select suitable field types.
-
Save the layer in the project folder.
-
Configure coded values using Layer Properties → Attributes Form, with widgets such as Value Map or Value Relation.
For straightforward field surveys, GeoPackage is often a convenient storage format because it supports multiple layers and attribute data in a single file. QGIS also supports shapefiles and other data sources, but some formats have limitations that make them less convenient for complex survey forms.
Official guidance: Mergin Maps form configuration.
Step 2: Configure Forms, Required Fields, and Photo Attachments
A mobile form should be simple enough to complete outdoors, even when the user is wearing gloves, standing in the sun, or working under time pressure.
Long forms with many unnecessary fields increase collection time and the risk of incomplete records.
2.1 Configure the form logically
Group the fields into meaningful sections, such as:
Section A — Site identification
- Site ID
- Site type
- Inspection date
Section B — Condition assessment
- Operational condition
- Water present
- Additional notes
Section C — Supporting evidence
- Photograph
- Optional supplementary photograph, if required
Use descriptive labels and short instructions. For example, Condition of water point is clearer than cond_code.
2.2 Set required fields and validation rules
Some fields are essential. For this survey, site_id, site_type, and condition may be required before an observation is accepted.
Other fields might be optional or conditional. A photograph may be mandatory for a damaged asset but unnecessary for a routine observation, depending on the project’s requirements.
Configure field constraints to prevent invalid entries:
-
Require key fields where appropriate.
-
Restrict numerical values to valid ranges.
-
Set sensible defaults for values that are genuinely predictable.
-
Hide fields that fieldworkers do not need to edit.
-
Use hints to explain what a valid answer looks like.
-
Test the form with realistic examples, including incomplete or invalid entries.
Do not make every field mandatory. A required field that cannot be completed in a difficult field situation may encourage users to enter invented values just to save the record.
ArcGIS Field Maps form setup
-
Publish or prepare an editable feature layer.
-
Open Field Maps Designer.
-
Select your map and open its form configuration.
-
Add the fields needed by the mobile survey.
-
Configure choice lists using coded-value domains or the form’s list-of-values options.
-
Set required fields, read-only fields, display labels, and help text.
-
Add an attachment form element if photographs are required.
-
Save and test the form in the Field Maps mobile app.
Make sure attachments are enabled on the feature layer. If offline collection is required, verify that attachment settings are compatible with offline map use.
Mergin Maps and QGIS form setup
-
Right-click the survey layer and select Properties → Attributes Form.
-
Choose Drag and Drop Designer if you want to arrange the fields into groups and tabs.
-
Set the
site_typeandconditionfields to the Value Map widget for predefined options. -
Configure required fields using field constraints or appropriate form expressions.
-
Configure default values where appropriate, such as a survey date.
-
Set a suitable Attachment widget for photo collection.
-
Use descriptive field aliases, hints, and labels.
-
Open the project in the Mergin Maps mobile app and confirm that the form works as intended.
In Mergin Maps and QField, attachment configuration is handled through QGIS project and layer settings. The exact storage method depends on the widget and project setup, so test that media files remain accessible after synchronization.
See Mergin Maps form widgets and QField attachment guidance.
Step 3: Publish or Synchronize the Project to the Cloud
The next task is getting the prepared project onto each fieldworker’s device.
The procedure depends on the platform.
Option A: Publish an ArcGIS Field Maps layer
ArcGIS Field Maps uses maps containing editable feature layers. For a typical hosted workflow, ArcGIS Online stores the shared data and synchronizes edits made by fieldworkers.
-
In ArcGIS Pro, confirm that the data schema and domains are complete.
-
On the Share tab, use Web Layer → Publish Web Layer or the appropriate sharing workflow for your environment.
-
Select a feature-layer type appropriate for field editing.
-
Set the title, folder, summary, and sharing permissions.
-
Confirm that editing is enabled and that attachments are configured if needed.
-
Publish the layer.
-
Verify the hosted feature layer’s settings in ArcGIS Online or your ArcGIS Enterprise environment.
-
Create or configure the web map containing the editable survey layer and any reference layers.
-
Open Field Maps Designer, configure the form and offline settings, and save the map.
For offline use, the hosted feature layer generally needs synchronization enabled, and the web map must be configured for offline use. See Publish feature layers and Take maps offline.
Permissions matter: Share the map and its layers only with the people or groups who require access. Fieldworkers must have the necessary account privileges to edit the data.
Option B: Create a Mergin Maps project
For the QGIS route, use the Mergin Maps QGIS plugin to package the project, publish it to the cloud, and maintain a synchronized working copy.
-
Install the Mergin Maps plugin through QGIS’s Plugins → Manage and Install Plugins interface.
-
Save your QGIS project in a local working folder.
-
Keep the project’s data and supporting files organized within the project folder, using paths that will remain valid on other devices.
-
Use the Mergin Maps toolbar to create a new project or package the current project.
-
Choose an appropriate workspace and project name.
-
Upload or synchronize the project with Mergin Maps Cloud.
-
Sign in to the Mergin Maps mobile application on the field devices.
-
Download the project and check that layers, forms, styling, and attachments work.
Mergin Maps recommends creating projects from QGIS when you need full control of the layers and form configuration. Its project structure includes the QGIS project and supporting data files. See Creating a Mergin Maps project.
Important: Store the working project on a local drive rather than a shared network drive when using the standard Mergin Maps synchronization workflow. Network-drive behavior can lead to synchronization issues.
Offline preparation checklist
Regardless of platform:
-
Download the project or defined offline map area before leaving the office.
-
Include a usable basemap for the intended working area.
-
Confirm that all editable layers and required attachments support offline use.
-
Check that enough storage is available on the device.
-
Test the project in airplane mode.
-
Reconnect and confirm that the test edits can synchronize correctly.
A map that opens in the office is not necessarily ready for offline work. Test it before field deployment.
Part 2: Field Execution
Once the project is prepared and downloaded, focus on consistent collection, location quality, and protecting the information captured by the field team.
Step 4: Collect Data Using the Mobile App
The core workflow is similar across mobile GIS platforms: open the map, locate the feature, create or select a record, complete its form, attach evidence, and save the observation.
4.1 Prepare the mobile device
Before starting:
-
Ensure the correct project has been downloaded.
-
Allow the app to access location services and the camera when required.
-
Confirm that GPS positioning is working.
-
Check that the phone has adequate battery and free storage.
-
Confirm the required survey forms and reference layers are available.
-
Review any field-specific collection instructions with the team.
Do not assume that the mobile map is offline-ready simply because it is visible. Open the downloaded map and test collection while disconnected from the internet.
4.2 Collect a point in ArcGIS Field Maps
-
Open Field Maps and select the prepared survey map.
-
Download and open the required offline area if you will be working without reliable connectivity.
-
Use the map and GPS location indicator to navigate to the feature.
-
Choose the option to add a new feature.
-
Confirm or capture the feature location using GPS or an appropriate manual positioning method.
-
Complete the form fields and select the correct values from the configured lists.
-
Attach the required photograph.
-
Review the attribute values and geometry.
-
Submit or save the feature using the app’s available action.
Once saved, the record is stored locally if working offline. It becomes available centrally after synchronization.
For GPS-based collection, check the displayed accuracy before accepting the location. Field Maps supports location-accuracy requirements, and it can record GPS metadata when the layer and settings have been configured to support it. Refer to the Field Maps collection settings.
4.3 Collect a point in Mergin Maps
-
Open the downloaded survey project in Mergin Maps.
-
Navigate to the site using the map and device location indicator.
-
Use the available digitizing or feature-creation action to create a point.
-
Confirm that the point geometry is located correctly.
-
Complete the configured attribute form.
-
Use the appropriate value maps or selection lists for categorical fields.
-
Capture the photograph through the attachment widget.
-
Review the record and save the changes.
The labels and icons may differ by mobile app version, but the important principle is to confirm that the geometry, attributes, and attachments are saved together in the project.
4.4 Example field record
A completed water-point record might look like this:
| Attribute | Recorded value |
|---|---|
| Site ID | WP-0001 |
| Site type | Borehole |
| Condition | Functional |
| Water present | Yes |
| Visit date | 12 October 2026 |
| Notes | Minor wear around the pump handle |
| Photograph | Attached image of the water point |
| Geometry | GPS-captured point |
This is an illustrative record. The coordinates, location accuracy, and other required metadata would need to be captured from the actual site.
4.5 Capture photographs consistently
A photograph can provide valuable evidence, but only when it is associated with the correct record and has sufficient quality.
- Take the image of the relevant asset or observation.
- Avoid capturing unnecessary people, private information, or unrelated scenes.
- Follow a consistent procedure for image orientation and composition.
- Review the photograph before saving it.
- Use the attachment field configured in the project rather than relying on a separate gallery of unlabelled images.
If multiple photographs are needed for a single feature, decide whether the project should use multiple attachments or a related photo table. A related table can be useful when each image needs its own date, type, or description.
Step 5: Work Offline and Monitor Data Quality
Remote field sites, forests, rural areas, and underground or enclosed infrastructure may have weak or no mobile signal. Offline collection prevents connectivity interruptions from stopping the survey.
Manage offline work
- Keep the required map areas, layers, and reference data on the device.
- Do not rely on an online basemap unless you have confirmed its offline availability.
- Save observations regularly.
- Synchronize when a reliable connection becomes available.
- Check the app’s project or synchronization status before finishing work for the day.
In Field Maps, map areas are downloaded for offline work when the map and layers have been configured appropriately. See Download maps in Field Maps.
In Mergin Maps, local changes can be synchronized when the device is online and the user has write permission. Manual synchronization is available, and automatic synchronization can be enabled where appropriate. See Mergin Maps mobile synchronization.
Battery management
GPS, the camera, screen brightness, and offline map rendering all consume power.
- Reduce screen brightness to a level that remains readable outdoors.
- Carry a charged power bank and charging cable.
- Close unrelated high-power applications.
- Avoid continuous GPS tracking when the survey only requires individual point observations.
- Take breaks to charge devices where practical.
- If the project requires all-day mapping, test battery usage in advance.
Never allow battery conservation to compromise the required positional accuracy or completeness of the survey.
Verify spatial accuracy
A smartphone’s location can be affected by satellite geometry, buildings, tree canopy, atmospheric conditions, and the quality of its GNSS receiver.
For important observations:
- Wait for a stable location fix.
- Check the displayed accuracy estimate.
- Avoid recording positions immediately beside tall buildings or under heavy canopy when possible.
- Use an external GNSS receiver when the project requires higher accuracy than the built-in receiver can provide.
- Record the accuracy and equipment information required by the project’s data-quality plan.
- Repeat the measurement when the recorded accuracy does not meet the survey specification.
Do not assume that the coordinate shown on the screen is accurate to the nearest metre. The displayed coordinate precision and the actual positional accuracy are not the same thing.
If the survey requires sub-metre or centimetre-level accuracy, plan the measurement method, correction service, equipment, and acceptance thresholds before collecting data.
Avoid synchronization conflicts
Conflicts can occur when multiple users edit the same features or when the desktop project’s schema changes while field devices still contain older versions.
To reduce the risk:
- Give each fieldworker a clearly defined survey area or set of records where feasible.
- Avoid simultaneous edits to the same feature while devices are offline.
- Synchronize outstanding field edits before changing the project schema.
- Keep backups of the working data before major changes.
- Check the synchronization status rather than assuming that every edit has reached the server.
Mergin Maps can create conflict files when changes cannot be merged automatically. Review these files to recover or reconcile the affected edits. See Mergin Maps missing-data and conflict recovery.
For QFieldCloud workflows, follow the synchronization procedure appropriate to the configured project mode. The QFieldCloud setup documentation explains how project changes and offline edits are handled.
Part 3: Post-Processing
Field collection is not complete just because records have been saved on the device. The final stage verifies synchronization, checks the geometry and attributes, and prepares the data for analysis.
Step 6: Synchronize Field Updates Back to the Desktop
ArcGIS Field Maps to ArcGIS Pro
For a hosted feature layer, the central dataset is managed through ArcGIS Online or ArcGIS Enterprise. Once edits have synchronized, ArcGIS Pro can access the updated data through the appropriate feature-layer connection.
-
Connect to the portal using an account with the necessary permissions.
-
Open the hosted feature layer or web map in ArcGIS Pro.
-
Refresh the layer or data view as necessary.
-
Confirm that the most recent field observations have arrived.
-
Review the attribute table and verify that photographs are available.
-
Export a copy to a file geodatabase if required for local analysis or archiving.
If using enterprise feature services or another supported data source, follow the appropriate refresh and editing workflow for that service.
Mergin Maps to QGIS
Mergin Maps synchronizes changes between the cloud project, field devices, and the desktop project.
-
Connect to the internet after returning from the field.
-
Open the Mergin Maps project in the mobile app and synchronize outstanding changes.
-
Open the corresponding working project in QGIS.
-
Use the Mergin Maps plugin to synchronize or retrieve the latest project changes.
-
Check the project status and confirm that pending changes have been handled.
-
Inspect the updated layers and attachments in QGIS.
Mergin Maps recommends checking the project status and synchronizing changes through the QGIS plugin and mobile app as appropriate. Avoid working from an outdated desktop copy when the cloud project contains newer field edits.
Step 7: Validate the Collected Data
Before analysis, check that the collected records meet the project specifications.
Attribute checks
-
Verify that all required fields are populated.
-
Check that coded values match the approved lists.
-
Identify duplicate IDs.
-
Check for implausible or missing numerical values.
-
Review observations marked as uncertain or not assessed.
-
Confirm that dates and collector identifiers are recorded correctly.
Geometry checks
-
Inspect the locations on the map.
-
Identify features outside the expected survey area.
-
Check for accidental duplicate points.
-
Verify line and polygon geometry where applicable.
-
Confirm the layer CRS and units.
Photo and attachment checks
-
Confirm that required photographs are present.
-
Open a sample of images to make sure they are readable.
-
Verify that each attachment belongs to the correct feature.
-
Check that no attachment paths are broken.
-
Ensure that media files have synchronized successfully.
Where the survey requires defined GPS accuracy thresholds, evaluate the recorded accuracy information and flag observations that fail the criteria. If the project did not collect accuracy metadata, do not assume that every point meets the expected standard; use another verification method or repeat the measurement if needed.
Step 8: Prepare the Dataset for Spatial Analysis
After quality control, the data can be used for further GIS analysis.
For the water-point example, you could:
- Map functional and non-functional water points.
- Calculate the distribution of water points by administrative area.
- Identify locations that need follow-up inspections.
- Compare observed conditions with population distribution.
- Create buffers or network-based accessibility measures where appropriate.
- Summarize field observations and prepare a final cartographic layout.
The correct analysis depends on the question. A point map can show where facilities were observed, but it does not necessarily demonstrate service coverage, reliability, or accessibility without additional data and analysis.
For academic work, document the field collection method, schema, sampling procedure, coordinate reference system, accuracy limitations, synchronization process, and data-cleaning decisions.
9. Final Field Operations Checklist
Before the team leaves the office:
-
The data schema, form fields, and choice lists have been checked.
-
Editing permissions and cloud settings are correct.
-
The project has been downloaded and tested offline.
-
GPS, camera, and storage permissions are working.
-
Each device has adequate battery and storage.
-
Fieldworkers understand the collection protocol and positional accuracy requirements.
At the end of each field day:
-
All observations have been saved.
-
Required photographs and attributes are present.
-
Outstanding changes have synchronized or have been clearly documented as pending.
-
Synchronization errors and conflicts have been investigated.
-
Updated data are available to the desktop GIS team.
-
A backup or versioned copy is retained according to the project data-management plan.
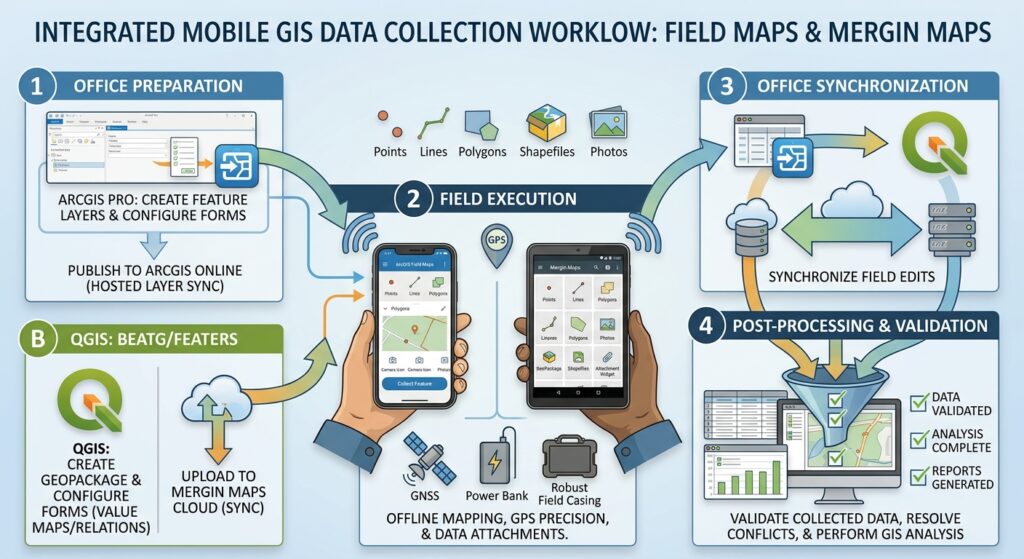
10. Conclusion
Mobile GIS field data collection replaces much of the repetitive work associated with paper forms and manual data transfer with a structured digital workflow.
ArcGIS Field Maps is a natural choice for teams using ArcGIS Online or ArcGIS Enterprise. Mergin Maps provides an integrated way to take QGIS projects into the field and synchronize survey results. QField offers another flexible route for mobile QGIS data collection, with optional QFieldCloud integration.
Whichever platform you choose, success depends on more than installing an application. The schema must be designed carefully, the forms must be easy to use, offline maps must be tested, positional accuracy must be monitored, and synchronization must be verified.
For student projects and professional field operations alike, the central principle is straightforward: design the data structure before the survey, test the complete workflow before deployment, and validate every field update before using it for analysis.