
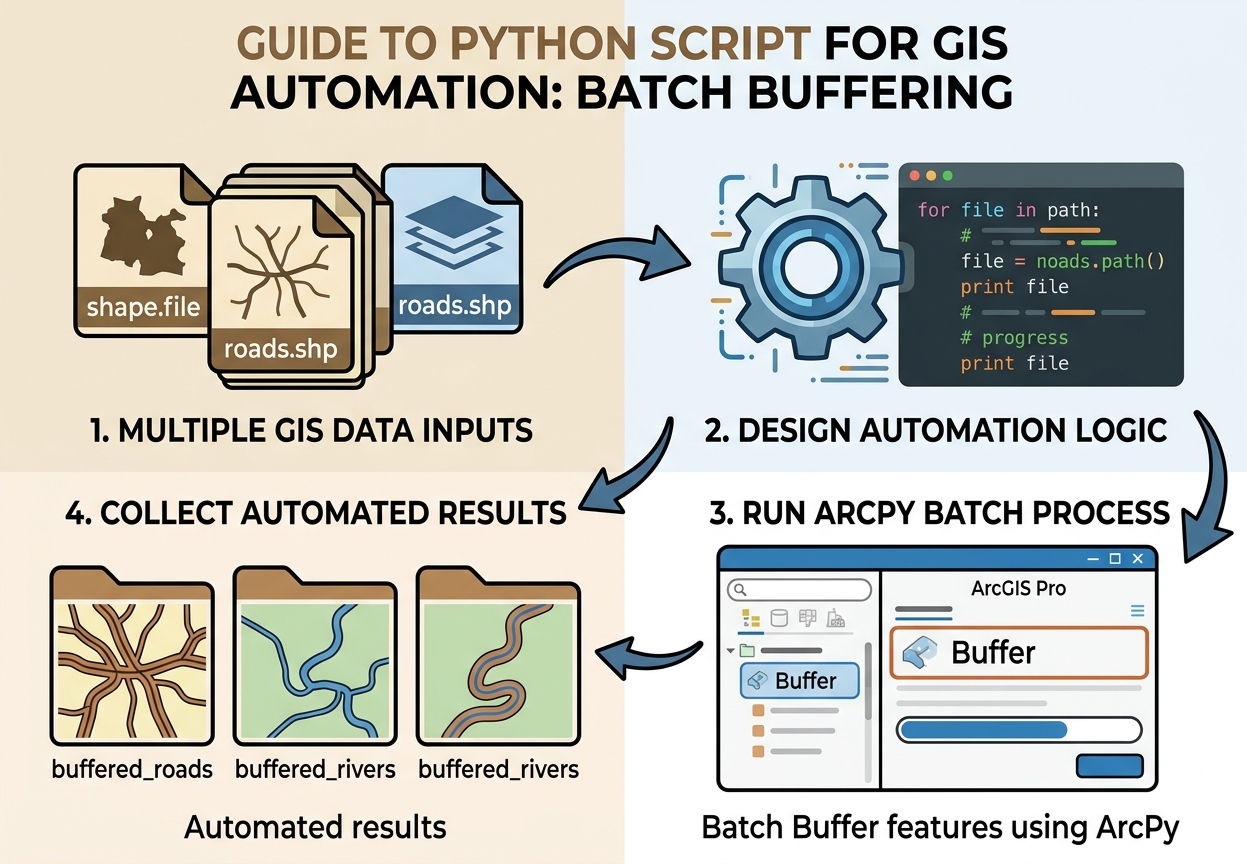
Here is a beginner-friendly tutorial built around a real automation task: taking many shapefiles from one folder and automatically creating buffered outputs with Python.
Python Script for GIS Automation: Batch Buffer Shapefiles with ArcPy
Introduction: Why GIS Students Should Learn Python
A Python script for GIS automation can turn repetitive GIS work from a manual, click-by-click process into a workflow that runs automatically.
Imagine receiving 50 shapefiles and being asked to:
- Open each layer.
- Run Buffer.
- Use the same distance.
- Save each output.
- Repeat 50 times.
Doing this manually is slow and increases the chance of inconsistent settings.
With Python, you can write the workflow once and let the computer repeat it.
For GIS students, learning Python also introduces an important transition:
From using GIS software → to programming GIS workflows.
Python is widely used for:
- Batch geoprocessing
- Data cleaning
- Raster processing
- Spatial analysis
- Map production
- File conversion
- Quality control
- Automated reporting
- Large datasets
Two common GIS Python environments are ArcPy for ArcGIS Pro and PyQGIS for QGIS.
This tutorial focuses on ArcPy batch processing because it provides a straightforward introduction to automating geoprocessing tools.
1. What Are We Automating?
Designing a python script for gis automation allows you to process multiple spatial datasets without opening each layer manually.
Our task is simple:
Find every shapefile in a folder and create a buffer around it.
Suppose our input folder contains:
roads.shp
rivers.shp
schools.shp
hospitals.shp
railways.shp
Instead of manually running Buffer five times, our script will automatically produce:
roads_buffer.shp
rivers_buffer.shp
schools_buffer.shp
hospitals_buffer.shp
railways_buffer.shp
The workflow becomes:
Input folder
     ↓
Find shapefiles
     ↓
Loop through each file
     ↓
Run Buffer
     ↓
Save output
     ↓
Move to next shapefile
2. What You Need
Before writing a python script for gis automation, ensure your workstation has access to the appropriate Python environment.
For the ArcPy example, you need:
- ArcGIS Pro
- A Python environment associated with ArcGIS Pro
- An input folder containing shapefiles
- A separate output folder
You do not need advanced programming knowledge.
The main Python concepts used are:
- Variables
- Strings
forloops- Lists
ifstatements- Functions
- File paths
- ArcPy geoprocessing tools
3. Understand the Folder Structure
Setting up clean input and output directories makes any python script for gis automation much easier to run and debug.
Create a simple project structure such as:
GIS_Automation/
│
├── input/
│   ├── roads.shp
│   ├── rivers.shp
│   ├── schools.shp
│   └── hospitals.shp
│
├── output/
│
└── batch_buffer.py
Keeping inputs and outputs separate is a good habit.
It prevents your script from accidentally processing its own generated outputs.
4. The Complete Python Script
This python script for gis automation buffers all shapefiles in a directory
Here is a beginner-friendly version of the automation workflow.
import arcpy
import os

# ---------------------------------------------------------
# 1. SET INPUT AND OUTPUT FOLDERS
# ---------------------------------------------------------

input_folder = r"C:\GIS_Automation\input"
output_folder = r"C:\GIS_Automation\output"

# Allow ArcPy to overwrite existing outputs
arcpy.env.overwriteOutput = True


# ---------------------------------------------------------
# 2. SET THE BUFFER DISTANCE
# ---------------------------------------------------------

buffer_distance = "500 Meters"


# ---------------------------------------------------------
# 3. FIND SHAPEFILES AND PROCESS THEM
# ---------------------------------------------------------

for filename in os.listdir(input_folder):

    # Only process files ending in .shp
    if filename.lower().endswith(".shp"):

        # Build the complete input file path
        input_path = os.path.join(input_folder, filename)

        # Remove .shp from the filename
        name = os.path.splitext(filename)[0]

        # Create the output filename
        output_name = name + "_buffer.shp"

        # Build the complete output path
        output_path = os.path.join(output_folder, output_name)

        # Run the Buffer tool
        arcpy.analysis.Buffer(
            input_path,
            output_path,
            buffer_distance
        )

        # Print progress to the Python console
        print(f"Buffered: {filename}")


print("Batch buffering complete!")
This relatively short script replaces a repetitive manual workflow.
5. Code Breakdown: Importing Libraries
The first lines are:
import arcpy
import os
arcpy
arcpy provides access to ArcGIS geoprocessing functionality from Python.
For example:
arcpy.analysis.Buffer()allows Python to call the Buffer geoprocessing tool.
Other ArcPy capabilities include:
arcpy.management.CopyFeatures()
arcpy.management.Project()
arcpy.management.Delete()
arcpy.analysis.Intersect()
arcpy.analysis.Clip()
This is where GIS and programming begin to connect.
os
Python’s built-in os module provides tools for working with:
- Files
- Folders
- Paths
- Directories
We use it here to find shapefiles and construct file paths.
6. Setting the Workspace Paths
The script defines:
input_folder = r"C:\GIS_Automation\input"
output_folder = r"C:\GIS_Automation\output"
These variables tell Python where the input and output data are located.
The r before the string is important.
Why Use r"C:\path"?
Windows paths commonly contain backslashes:
C:\GIS_Automation\inputPython uses the backslash character \ for escape sequences.
For example:
"\n"represents a new line.
Using a raw string:
r"C:\GIS_Automation\input"tells Python to treat the backslashes as literal characters.
This is a convenient way to avoid many Windows path problems.
7. Alternative: Use Forward Slashes
Another option is:
input_folder = "C:/GIS_Automation/input"Python can generally handle forward slashes in Windows paths.
You can therefore use either:
r"C:\GIS_Automation\input"or:
"C:/GIS_Automation/input"The important thing is to create a valid path.
8. Allow Outputs to Be Overwritten
The line:
arcpy.env.overwriteOutput = Trueallows the script to replace existing output files.
Without it, the script may stop when an output with the same name already exists.
For example:
roads_buffer.shpalready exists.
The script may report an output-exists error rather than replacing it.
Caution
Overwrite settings are convenient during development, but use them carefully.
You do not want an automation script accidentally destroying valuable results.
9. Set the Buffer Distance
We define:
buffer_distance = "500 Meters"This means every input shapefile will receive a 500-meter buffer.
You could change it to:
buffer_distance = "1 Kilometers"or:
buffer_distance = "100 Meters"The important lesson is that the parameter is stored in a variable.
That means you can change one line instead of modifying the Buffer command itself.
10. Loop Through the Folder
The Constructing for loops is the core logic behind every python script for gis automation.main automation begins here:
for filename in os.listdir(input_folder):This means:
For every item found inside the input folder, perform the following instructions.
If the folder contains:
roads.shp
rivers.shp
schools.shp
hospitals.shp
the loop processes them one at a time.
This is one of the most important programming concepts for GIS automation.
11. Only Process Shapefiles
Inside the loop we use:
if filename.lower().endswith(".shp"):This prevents the script from trying to process unrelated files.
For example, the folder might contain:
roads.shp
roads.dbf
roads.shx
project_notes.txt
Only the .shp file is selected by this condition.
Why use .lower()?
It makes the test case-insensitive.
Therefore:
roads.shp
ROADS.SHP
Roads.Shp
can all be recognized.
12. Build the Input Path
This line:
input_path = os.path.join(input_folder, filename)combines the folder and filename.
For example:
C:\GIS_Automation\inputplus:
roads.shpbecomes:
C:\GIS_Automation\input\roads.shpUsing os.path.join() is safer than manually constructing paths with strings.
Avoid unnecessarily doing this:
input_folder + "\\" + filenameInstead use:
os.path.join(input_folder, filename)13. Remove the File Extension
This line:
name = os.path.splitext(filename)[0]takes:
roads.shpand extracts:
roadsWe can then use that name to create our output.
14. Create the Output Filename
We write:
output_name = name + "_buffer.shp"If the input is:
roads.shpthe output becomes:
roads_buffer.shpSimilarly:
rivers.shpbecomes:
rivers_buffer.shpThis is much easier than manually naming every output.
15. Build the Output Path
We then create:
output_path = os.path.join(output_folder, output_name)For example:
C:\GIS_Automation\output\roads_buffer.shpNow ArcPy knows exactly where to save the result.
16. Call the Spatial Tool Programmatically
The actual GIS operation is:
arcpy.analysis.Buffer(
    input_path,
    output_path,
    buffer_distance
)
This is the key moment where Python calls an ArcGIS geoprocessing tool.
Conceptually:
Python
  ↓
ArcPy
  ↓
Buffer tool
  ↓
Input shapefile
  ↓
Buffered shapefile
You are essentially controlling ArcGIS geoprocessing through code.
17. Print Progress Messages
This line:
print(f"Buffered: {filename}")prints a message after each file is processed.
The console might show:
Buffered: roads.shp
Buffered: rivers.shp
Buffered: schools.shp
Buffered: hospitals.shp
Batch buffering complete!
This is useful because you can see whether the script is progressing.
18. Using os.walk() for Nested Folders
When dealing with subfolders, updating your python script for gis automation with os.walk() handles deep directory structures.
os.listdir() works well when all your shapefiles are in one folder.
But sometimes GIS projects have multiple subfolders.
For example:
GIS_Data/
│
├── Roads/
│   ├── major_roads.shp
│   └── minor_roads.shp
│
├── Rivers/
│   ├── rivers.shp
│
└── Facilities/
    ├── schools.shp
    └── hospitals.shp
In that situation, os.walk() is useful.
Example:
for root, folders, files in os.walk(input_folder):

    for filename in files:

        if filename.lower().endswith(".shp"):

            input_path = os.path.join(root, filename)

            print(input_path)
os.walk() recursively moves through the folder structure.
It can therefore find shapefiles inside subfolders.
19. os.listdir() vs os.walk()
| Method | Best For | Searches Subfolders? |
|---|---|---|
os.listdir() |
Simple single-folder workflows | No |
os.walk() |
Large/nested GIS data structures | Yes |
For your first automation scripts, start with os.listdir().
Once you understand loops and file paths, move to os.walk().
20. A Safer Batch Buffer Script
For real projects, you can add error handling so that one failed dataset does not necessarily stop the entire batch. Adding try/except error handling turns a basic draft into a reliable python script for gis automation for production tasks.
import arcpy
import os

input_folder = r"C:\GIS_Automation\input"
output_folder = r"C:\GIS_Automation\output"

buffer_distance = "500 Meters"

arcpy.env.overwriteOutput = True

for filename in os.listdir(input_folder):

    if filename.lower().endswith(".shp"):

        input_path = os.path.join(input_folder, filename)

        name = os.path.splitext(filename)[0]
        output_name = name + "_buffer.shp"
        output_path = os.path.join(output_folder, output_name)

        try:

            arcpy.analysis.Buffer(
                input_path,
                output_path,
                buffer_distance
            )

            print(f"SUCCESS: {filename}")

        except Exception as error:

            print(f"FAILED: {filename}")
            print(error)

print("Batch processing finished.")
The try/except structure allows the script to report a problem instead of silently failing.
21. Common Error: Syntax Errors
A syntax error means Python cannot understand the structure of your code.
For example:
for filename in os.listdir(input_folder)is missing a colon.
Correct:
for filename in os.listdir(input_folder):Common beginner causes
Check for:
- Missing
: - Missing parentheses
- Missing quotation marks
- Incorrect indentation
- Misspelled Python keywords
Python is strict about syntax.
22. Common Error: Incorrect Windows Paths
This can cause problems:
input_folder = "C:\GIS\data"Depending on the characters in the path, Python may interpret backslashes as escape sequences.
Use:
input_folder = r"C:\GIS\data"or:
input_folder = "C:/GIS/data"Also check that the folder actually exists.
23. Common Error: File Not Found
If Python reports that a file or directory cannot be found, inspect your path.
For example:
input_folder = r"C:\GIS_Automation\input"Check:
- Does the folder exist?
- Is the spelling correct?
- Is the drive letter correct?
- Did you accidentally include a filename instead of a folder?
- Are you using the correct project directory?
You can test the path with:
print(os.path.exists(input_folder))If the result is:
TruePython can find the folder.
If it returns:
Falsethe path needs attention.
24. Common Error: Schema Locks
A schema lock occurs when ArcGIS is unable to modify or overwrite a dataset because another process has it open.
This can happen when:
- A shapefile is open in ArcGIS Pro.
- An attribute table is open.
- Another application is accessing the data.
- Another GIS process is using the dataset.
Solutions
Try:
- Close the input/output attribute tables.
- Close unnecessary ArcGIS Pro projects or maps.
- Make sure the output is not being edited.
- Avoid saving outputs directly over actively used datasets.
- Write results to a separate output folder.
- Restart ArcGIS Pro if a lock remains.
A useful automation principle is:
Read from one location and write to another.
This reduces accidental conflicts.
25. Common Error: Output Already Exists
If you receive an error because an output already exists, you can either delete the old output or enable:
arcpy.env.overwriteOutput = TrueFor controlled workflows, another option is to create unique output names rather than overwriting existing results.
26. Common Error: Invalid Geometry
A buffer operation can fail because an input dataset contains problematic geometry.
Before batch processing, consider checking geometry with:
Check Geometry
and, where appropriate:
Repair Geometry
This becomes particularly important when processing datasets obtained from multiple sources.
27. Why This Is More Than a Buffer Exercise
The general structure of this python script for gis automation applies to clips, projections, and raster processing.
The real lesson is not the Buffer tool.
The important pattern is:
for dataset in folder:

    process(dataset)

    save_result(dataset)
Once you understand this structure, you can automate many GIS tasks.
For example:
Loop through shapefiles
        ↓
Project each layer
or:
Loop through shapefiles
        ↓
Clip each layer
        ↓
Save outputs
or:
Loop through rasters
        ↓
Reclassify each raster
        ↓
Save outputs
or:
Loop through datasets
        ↓
Calculate fields
        ↓
Export results
That is the foundation of GIS automation.
28. Example: Other ArcPy Tools You Can Automate
Once you understand the batch-buffer example, you can replace the Buffer tool with other geoprocessing operations.
Clip
arcpy.analysis.Clip(
    input_path,
    clip_features,
    output_path
)
Project
arcpy.management.Project(
    input_path,
    output_path,
    spatial_reference
)
Intersect
arcpy.analysis.Intersect(
    [layer1, layer2],
    output_path
)
Dissolve
arcpy.management.Dissolve(
    input_path,
    output_path
)
The programming structure can remain largely the same while the GIS operation changes.
29. Where PyQGIS Fits In
If you use QGIS rather than ArcGIS Pro, the equivalent programming environment is PyQGIS.
A simple PyQGIS buffer operation might look conceptually like:
processing.run(
    "native:buffer",
    {
        "INPUT": input_path,
        "DISTANCE": 500,
        "OUTPUT": output_path
    }
)
The exact parameters depend on the QGIS processing algorithm being used.
The underlying programming idea remains the same:
Find datasets
      ↓
Loop through datasets
      ↓
Run GIS tool
      ↓
Save output
So learning one environment helps you understand the broader concept of programmable GIS.
30. A Beginner’s Mental Model for GIS Programming
Structuring your inputs, logic, and outputs clearly ensures every python script for gis automation executes smoothly.
When approaching a GIS automation problem, break it into four questions.
1. What are my inputs?
Example:
50 shapefiles2. What operation do I want to perform?
Example:
500 m buffer3. What should each output be called?
Example:
original_name + "_buffer"4. What should happen repeatedly?
Example:
for filename in files:Once you can answer those four questions, many automation problems become much easier to design.
31. Beginner Automation Checklist
Before running your script, check:
- ArcGIS Pro/Python environment is available.
- Input folder exists.
- Output folder exists.
- Input files are valid shapefiles.
- The Buffer distance is appropriate.
- The input data uses appropriate units/CRS for the analysis.
- Output names are valid.
- The output folder is not being actively edited.
-
arcpy.env.overwriteOutputis set intentionally. - Python indentation is correct.
- Windows paths use raw strings or forward slashes.
- The script has been tested on a small number of files first.
Final Takeaway
A Python script for GIS automation does not need to be complicated. Mastering this python script for gis automation gives you a strong template for building scalable geoprocessing scripts.
The batch-buffer example teaches several fundamental programming concepts:
Variables
   +
File paths
   +
Loops
   +
Conditions
   +
ArcPy tools
   +
Output naming
   =
GIS automation
The most important transition for a beginner is to stop thinking:
“How do I perform this operation 50 times?”
and start thinking:
“What instructions would I give the computer so it can perform this operation for every dataset?”
Once you understand that mindset, ArcPy batch processing, GIS batch buffer Python, and a loop through shapefiles script become variations of the same basic programming pattern.
Your first goal does not need to be becoming an advanced Python developer. Start by automating one repetitive GIS task, make the script reliable, then gradually add loops, conditions, error handling, logging, and more sophisticated spatial operations.