
Geocoding Addresses in GIS: 5 Easy Steps to Map Excel Data
Introduction
Geocoding addresses in GIS is the process of converting descriptive location information—such as a street address, place name, or postal address—into geographic coordinates that GIS software can display as points on a map.
This becomes especially useful when your lecturer gives you an Excel spreadsheet containing dozens or hundreds of addresses but no latitude or longitude columns. Instead of manually finding every location, you can clean the spreadsheet, send the addresses to a geocoding service, and create a point layer for spatial analysis.
The challenge is that poorly formatted addresses, missing city information, spelling errors, ambiguous place names, and limitations imposed by free geocoding services can cause some records to remain unmatched.
This guide provides a practical workflow for turning an Excel address list into a GIS point layer using QGIS or ArcGIS Pro.
What you will learn
| Step | Task |
|---|---|
| 1 | Clean and prepare your Excel addresses |
| 2 | Combine address fields into searchable strings |
| 3 | Choose a geocoding method in QGIS or ArcGIS Pro |
| 4 | Match addresses and create point features |
| 5 | Check, correct, and export the results |
| 6 | Troubleshoot unmatched addresses |
| 7 | Prepare the final dataset for your GIS assignment |
Why Geocoding Addresses in GIS Matters
An address such as:
“Moi Avenue, Nairobi, Kenya”
is meaningful to a person, but GIS software needs geographic coordinates to place it precisely on a map.
A geocoder uses an address database or geographic service to find the location represented by that text and returns coordinates, usually latitude and longitude.
Once your addresses become point features, you can perform analysis such as:
- Mapping customer or population locations.
- Finding the nearest facilities.
- Creating buffers around locations.
- Performing spatial joins.
- Measuring distances.
- Identifying geographic clusters.
- Conducting service-area analysis.
- Creating thematic maps.
The basic workflow is:
Excel addresses → Clean data → Geocoding service → Latitude/longitude → GIS point layer → Spatial analysis
Step 1: Clean Your Excel Address Data
The quality of your geocoding results depends heavily on the quality of your input addresses.
Before opening QGIS or ArcGIS Pro, inspect the Excel spreadsheet carefully.
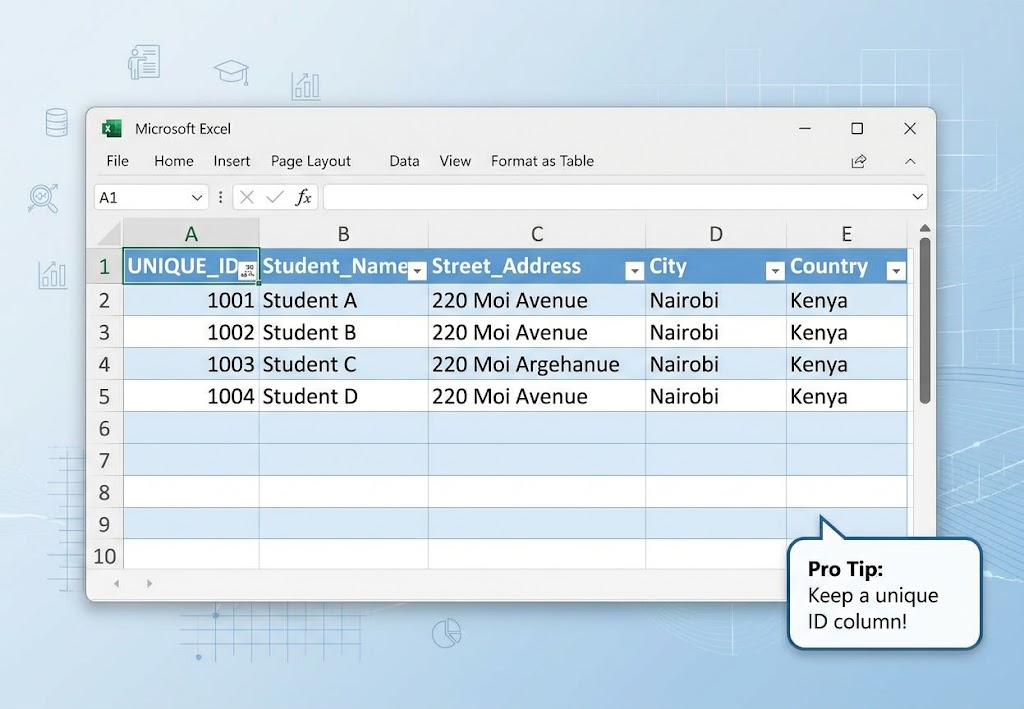
A useful spreadsheet might look like this:
| ID | Name | Street | City | Country |
|---|---|---|---|---|
| 001 | Student A | Moi Avenue | Nairobi | Kenya |
| 002 | Student B | Kenyatta Avenue | Nairobi | Kenya |
| 003 | Student C | Kimathi Street | Nairobi | Kenya |
Keep the original ID column. You will need it later to connect the geocoded points back to the original records.
Remove unnecessary formatting
Check for:
- Empty rows.
- Duplicate records.
- Missing addresses.
- Extra spaces.
- Inconsistent spelling.
- Inconsistent country names.
- Abbreviations.
- Accidental punctuation.
For example:
Moi Avenue, Nairobi, Kenya
Moi Ave, Nairobi, Kenya
may represent the same location but are not identical strings.
Consistency generally makes matching easier.
Check missing values
A record containing only:
Nairobimay be too vague to identify a specific location.
A more complete record might contain:
Moi Avenue, Nairobi, KenyaIf your assignment permits it, add missing city, county/state, and country information before geocoding.
Pro Tip: Never overwrite your original spreadsheet. Save a cleaned copy such as
addresses_cleaned.xlsxso you can return to the original data if something goes wrong.
Step 2: Combine Address Fields in Excel
If your address is divided across several columns, create one field containing the complete searchable address.
For example:
| Street | City | Country |
|---|---|---|
| Moi Avenue | Nairobi | Kenya |
You can combine the fields into:
Moi Avenue, Nairobi, KenyaUsing Excel’s CONCAT function
Suppose:
- A2 = Street
- B2 = City
- C2 = Country
You can use:
=CONCAT(A2,", ",B2,", ",C2)Alternatively, use:
=A2&", "&B2&", "&C2Name the new column something clear, such as:
full_address
Your final table could therefore look like:
| ID | Street | City | Country | full_address |
|---|---|---|---|---|
| 001 | Moi Avenue | Nairobi | Kenya | Moi Avenue, Nairobi, Kenya |
| 002 | Kenyatta Avenue | Nairobi | Kenya | Kenyatta Avenue, Nairobi, Kenya |
[IMAGE PLACEHOLDER: Excel worksheet showing Street, City, Country, and full_address columns | Alt Text: Excel address concatenation for geocoding addresses in GIS]
Why include the country?
Country names are particularly important when addresses are ambiguous.
For example, a place called “Springfield” can occur in multiple countries or regions. Adding the country gives the geocoder additional information to identify the intended location.
Step 3: Choose Your GIS Geocoding Method
There are several ways to convert addresses into geographic coordinates.
The appropriate choice depends on your software, assignment requirements, available internet access, and whether your institution has access to a commercial geocoding service.
Common approaches include:
| Method | Software/service | Best use |
|---|---|---|
| QGIS plugins/services | QGIS | Student projects |
| Nominatim/OpenStreetMap | QGIS-compatible workflows | Open data |
| ArcGIS World Geocoding Service | ArcGIS Pro | ArcGIS workflows |
| Commercial APIs | Various | Large-scale projects |
[Internal Link Context: Suggest linking to related article on how to import Excel data into QGIS and ArcGIS Pro]
Option A: Geocoding in QGIS
QGIS is open-source and supports several approaches to address geocoding.
One historically common student workflow uses plugins such as MMQGIS, which includes a geocoding tool. However, plugin availability, provider support, API requirements, and service limits can change, so always check the current plugin documentation before relying on it for a large assignment.
Another option is using an OpenStreetMap-based geocoder such as Nominatim, subject to its usage policies and rate limitations.
Install a QGIS plugin
If your chosen workflow requires a plugin:
- Open QGIS.
- Go to Plugins → Manage and Install Plugins.
- Search for the required geocoding plugin.
- Review its provider and documentation.
- Install the plugin.
- Restart QGIS if necessary.
For an assignment, test the workflow with five or ten addresses before processing your entire spreadsheet.
Pro Tip: Free geocoding services often have rate limits. Do not send hundreds or thousands of requests repeatedly while testing your workflow. Check the provider’s current usage policy first.
Step 4: Geocode Addresses in QGIS
The exact interface depends on the plugin or service you use, but the underlying process is similar.
Prepare your input table
Your CSV or Excel-derived table should contain a unique identifier and a complete address field.
For example:
ID,full_address
001,"Moi Avenue, Nairobi, Kenya"
002,"Kenyatta Avenue, Nairobi, Kenya"
003,"Kimathi Street, Nairobi, Kenya"
If the tool requires CSV input, export your cleaned Excel table as:
File → Save As → CSV
Run the geocoding operation
With a supported geocoding workflow:
- Open the geocoding tool.
- Select your input CSV/table.
- Select the address field.
- Choose the geocoding provider.
- Specify the output location.
- Run the operation.
The geocoder will attempt to associate each address with geographic coordinates.
A successful result may contain fields such as:
ID
full_address
latitude
longitude
display_name
Load the coordinates into QGIS
If the result is returned as a table containing latitude and longitude:
- Open QGIS.
- Go to Layer → Add Layer → Add Delimited Text Layer.
- Select the CSV.
- Set the X field to longitude.
- Set the Y field to latitude.
- Select the appropriate coordinate reference system.
- Click Add.
The records will appear as point features.
[IMAGE PLACEHOLDER: QGIS Add Delimited Text Layer dialog showing longitude and latitude fields | Alt Text: QGIS geocoding addresses in GIS latitude longitude point layer]
Be careful with X and Y
For standard geographic coordinates:
X = Longitude
Y = Latitude
A common beginner mistake is reversing these fields.
Step 5: Geocode Addresses in ArcGIS Pro
ArcGIS Pro provides integrated geocoding capabilities through address locators and the ArcGIS World Geocoding Service, depending on your account, licensing, and organizational configuration.
Add your Excel spreadsheet
In ArcGIS Pro:
Map → Add Data
Select your Excel workbook and add the appropriate worksheet.
Check the attribute table to make sure the addresses imported correctly.
Create or use an address locator
A locator defines how addresses are interpreted and matched to geographic locations.
For an existing locator, use the geocoding tools available in the Geoprocessing pane.
Depending on your ArcGIS Pro version and workflow, look for tools under:
Geocoding
or search the Geoprocessing pane for:
Geocode Addresses
Configure the input
The general workflow is:
- Open Geocode Addresses.
- Select your input table.
- Select the address locator.
- Map the address fields.
- Specify the output feature class.
- Run the tool.
ArcGIS Pro will generate a point feature class containing the matched addresses.
Review the matching results
Do not assume every address was matched correctly.
Review the geocoding result fields and identify records with:
- Matched status.
- Tied or ambiguous matches.
- Unmatched addresses.
- Low match confidence.
The exact fields and matching categories depend on the locator and ArcGIS workflow you are using.
Step 6: Check and Correct Unmatched Addresses
Even a well-prepared spreadsheet can produce unmatched records.
Common causes include:
1. Spelling errors
Example:
Kenyatta Avenuinstead of:
Kenyatta AvenueCorrect the spelling and retry.
2. Incomplete addresses
An entry such as:
Westlandsmay identify a broad neighborhood rather than a precise location.
If possible, add a street, building, institution, postal code, city, or other identifying information.
3. Ambiguous place names
Some place names exist in multiple locations.
Add additional geographic information:
Town, County, Countryrather than relying on the town name alone.
4. Non-standard abbreviations
Standardize abbreviations where possible.
For example, avoid mixing:
Rd
Road
Rd.
within the same dataset.
Pro Tip: Do not manually assign coordinates to every failed address without documenting the source. For an academic assignment, record which addresses were unmatched and explain how any manually corrected locations were verified.
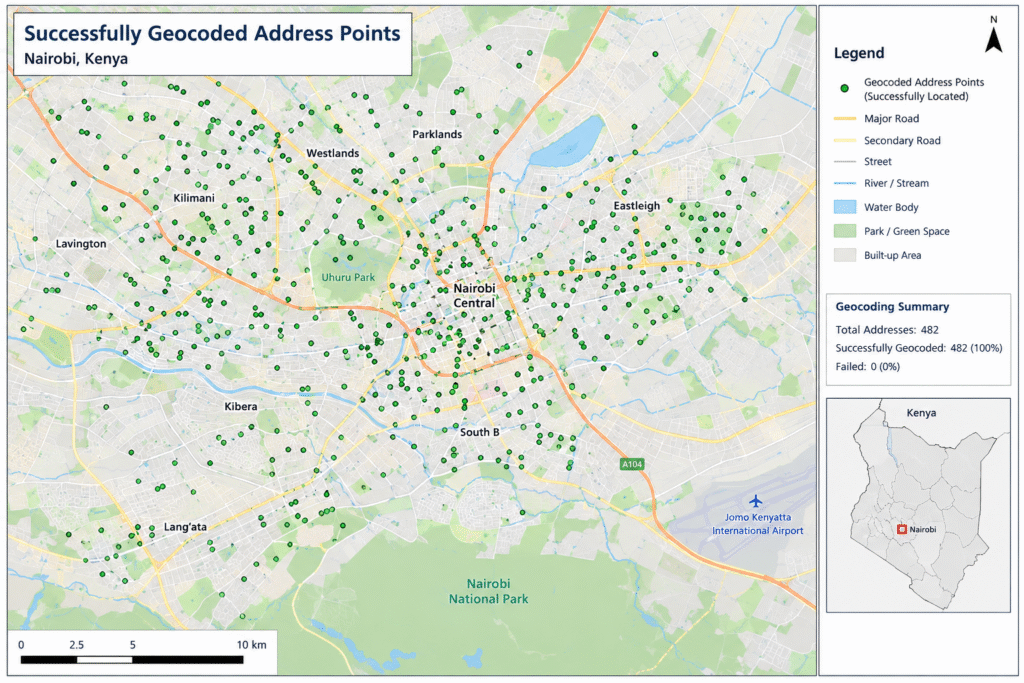
Step 7: Verify the Geocoded Points
Geocoding creates a location estimate, not necessarily a perfect survey-grade position.
This is especially important when your subsequent GIS analysis depends on precise coordinates.
Zoom into several points and compare them with your expected locations.
Check:
- Does the point fall in the correct city?
- Is it on the expected street?
- Is it in the correct neighborhood?
- Are points appearing in another country?
- Are multiple addresses assigned to exactly the same location unexpectedly?
For a university assignment, manually inspect a sample of the results even if the software reports a high match rate.
Step 8: Export the Geocoded Points
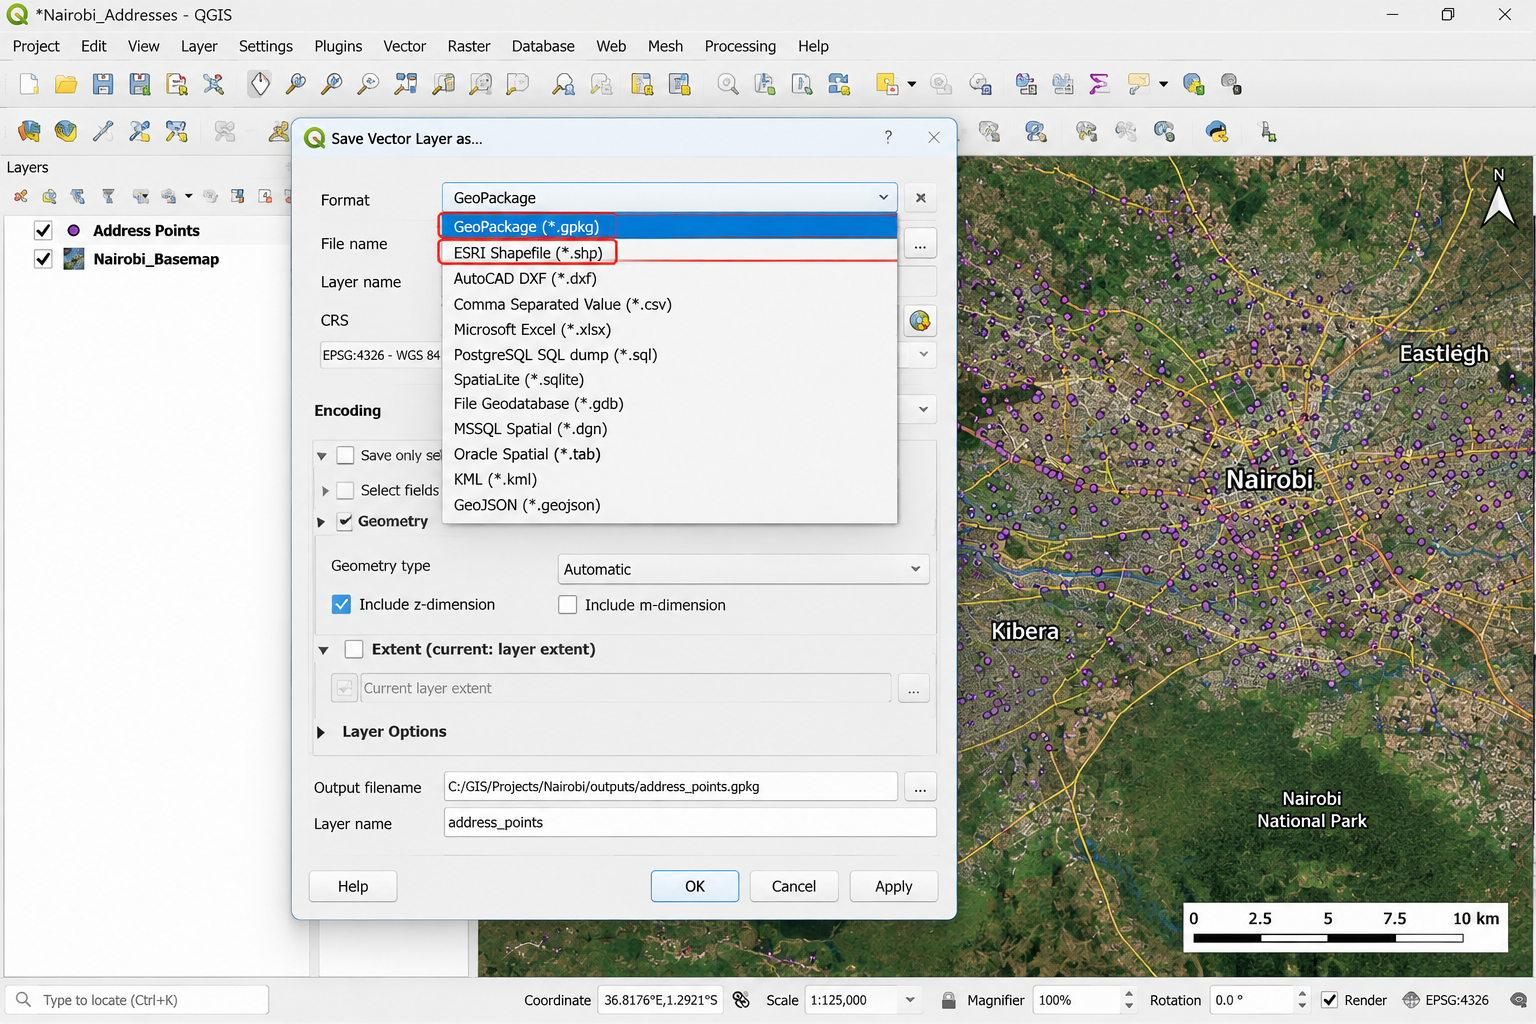
Once your results have been checked, save them in a GIS-friendly format.
Export from QGIS
Right-click the point layer and select:
Export → Save Features As
You can choose:
- GeoPackage
- ESRI Shapefile
- GeoJSON
- Other supported formats
For most modern student projects, GeoPackage is an excellent choice because it can store multiple layers in one file and avoids some of the limitations associated with shapefiles.
Export from ArcGIS Pro
For a geodatabase workflow, save the final feature class in your project geodatabase.
If your lecturer specifically requests a Shapefile, you can export it using the appropriate data-export tools.
Step 9: Use the Geocoded Data in Your GIS Analysis
Your address list is now a spatial dataset.
You can use it for further analysis such as:
Buffer analysis
Create zones around your address points.
QGIS:
Processing Toolbox → Buffer
ArcGIS Pro:
Analysis → Tools → Buffer
Spatial join
Connect address points to administrative boundaries or other polygon datasets.
Nearest-feature analysis
Find the nearest hospital, school, road, business, or other facility.
Density analysis
If your assignment involves identifying concentrations of points, you can use point-density or heat-map techniques.
The key advantage is that your original spreadsheet has now become a dataset that can participate in spatial analysis.
Common Geocoding Mistakes to Avoid
Common Pitfall — Choosing the wrong spatial reference: Latitude/longitude data is normally stored in a geographic CRS such as WGS 84 (EPSG:4326). If your assignment requires measurements in meters, consider projecting the resulting points into an appropriate projected CRS before calculating distances or areas.
Common Pitfall — Ignoring API limits: Nominatim and other free services are not unlimited bulk-geocoding APIs. Follow the provider’s usage policy and rate limits. MMQGIS or another plugin does not remove restrictions imposed by the underlying service.
Common Pitfall — Accepting every match: A record can technically receive a match while still being geographically wrong. Always inspect a sample of points and investigate ambiguous results.
Geocoding vs. Reverse Geocoding
The two processes work in opposite directions.
Geocoding:
Address → CoordinatesExample:
Moi Avenue, Nairobi → Latitude + LongitudeReverse geocoding:
Coordinates → AddressExample:
Latitude + Longitude → Nearby street/addressUnderstanding this distinction is important when writing the methodology section of a GIS assignment.
Recommended Data Structure for Your GIS Lab
Before submitting your assignment, aim for a final table resembling:
| ID | Full Address | Latitude | Longitude | Match Status |
|---|---|---|---|---|
| 001 | Moi Avenue, Nairobi | -1.xxxx | 36.xxxx | Matched |
| 002 | Kenyatta Avenue, Nairobi | -1.xxxx | 36.xxxx | Matched |
| 003 | Example Address | — | — | Unmatched |
Keep the original address and ID fields even after obtaining coordinates.
This preserves the relationship between your GIS point features and the original Excel records.
Frequently Asked Questions (FAQ)
What is the difference between geocoding and reverse geocoding?
Geocoding converts an address or place description into geographic coordinates. Reverse geocoding does the opposite: it converts coordinates into a corresponding address or place description.
Why did some of my addresses fail to match?
Addresses can fail because of spelling mistakes, incomplete information, ambiguous place names, missing postal information, or limitations in the geocoder’s database. Clean and standardize the address, add geographic context, then retry.
Is geocoding in ArcGIS Pro or QGIS free?
QGIS itself is free and open-source, but individual geocoding services can impose usage limits or other conditions. ArcGIS Pro geocoding depends on the available locator, ArcGIS account, credits, licensing, and service configuration.
Conclusion
Geocoding transforms a simple Excel address list into a useful spatial dataset.
The essential workflow is:
Clean Excel data → Combine address fields → Choose a geocoding service → Match addresses → Review unmatched records → Verify locations → Export points → Perform spatial analysis.
For QGIS users, open geocoding services and compatible plugins can provide practical solutions for student projects. ArcGIS Pro users can use address locators and the Geocode Addresses workflow.
The most important lesson is to treat geocoding as a data-quality process, not simply a button that creates points. Clean addresses, document your source, respect API limitations, check the coordinate system, and manually inspect questionable matches.
If you are stuck with an address locator error, unmatched records, incorrect coordinates, or a QGIS/ArcGIS Pro geocoding workflow, leave your question in the comments. And check out our other GIS tutorials for step-by-step help with spatial joins, attribute-table operations, vector analysis, and GIS lab reports.