
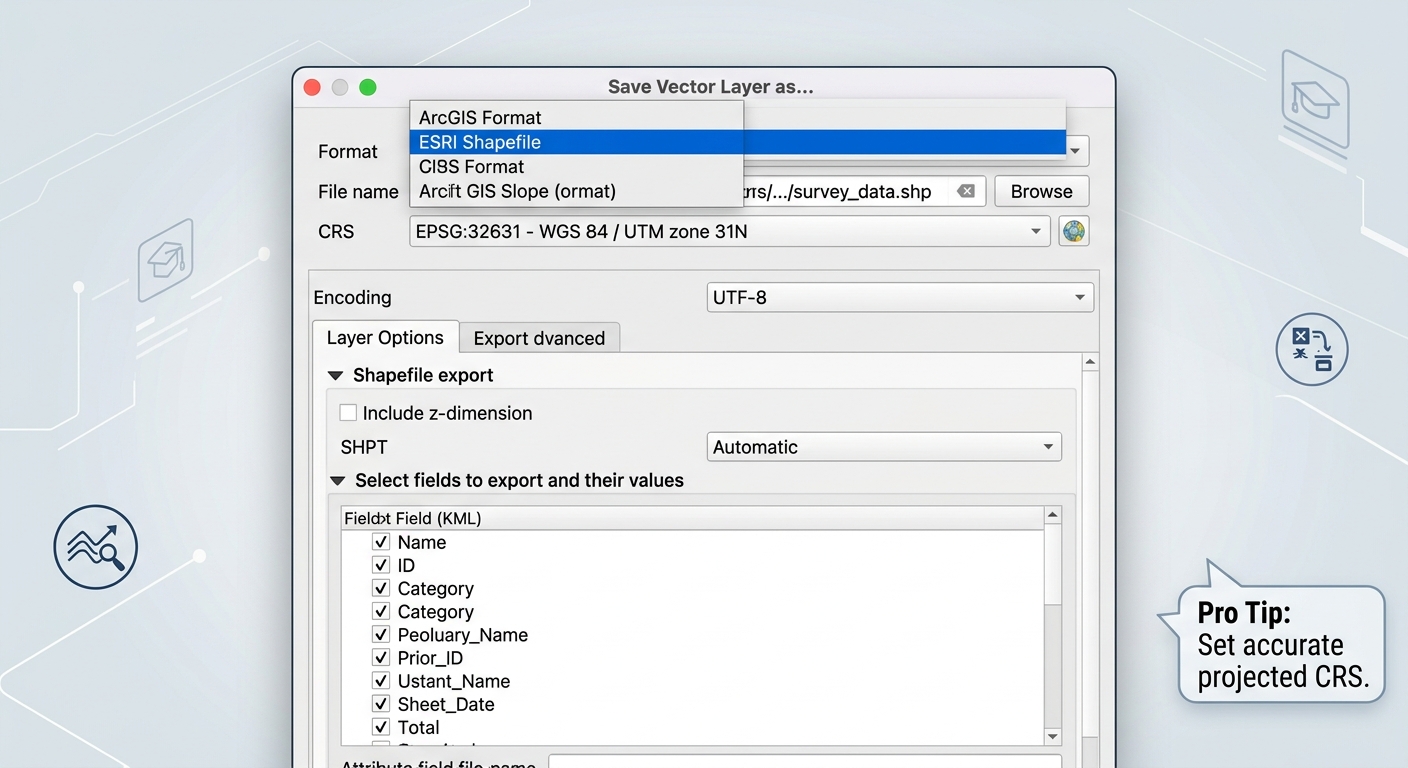
Convert KML to Shapefile in GIS: 3 Fast Methods
If your professor sends you a Google Earth file for a project, knowing how to convert KML to Shapefile is essential for running spatial analysis in QGIS or ArcGIS Pro. These formats are useful for displaying locations in Google Earth, but they are not always convenient when you need to perform analysis in QGIS or ArcGIS Pro.
Learning how to convert KML to Shapefile allows you to move Google Earth points, lines, and polygons into a more traditional GIS workflow. This is particularly useful for field-data assignments, mapping exercises, digitization projects, and spatial analysis.
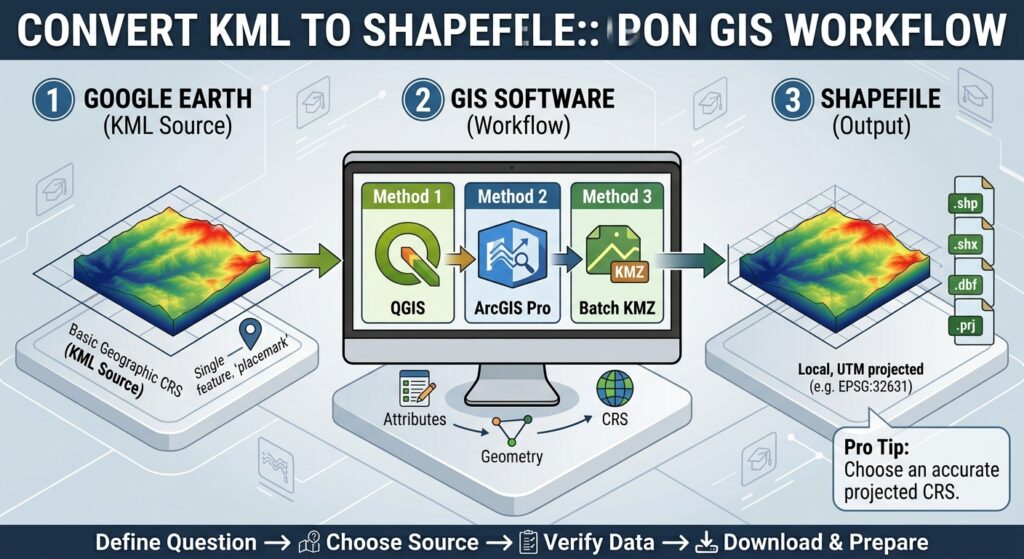
In this guide, you will learn three practical methods:
- Convert KML to Shapefile in QGIS.
- Convert KML to Shapefile using ArcGIS Pro.
- Convert multiple KMZ files using batch-processing workflows.
We will also cover common problems involving coordinate systems, elevation values, Google Earth styling, and the difference between KML and KMZ.
What Is KML and Why Convert It to Shapefile?
KML (Keyhole Markup Language) is an XML-based geographic data format commonly associated with Google Earth. It can store geographic features such as:
- Points or placemarks
- Lines and paths
- Polygons
- Names and descriptions
- Basic styling
- Links and some supporting media
A KMZ file is essentially a compressed version of KML. It may contain a KML document together with images, icons, or other supporting files.
A Shapefile, meanwhile, is a common vector data format used by desktop GIS software. Technically, a Shapefile is not a single file. A functioning dataset normally contains several related files, including .shp, .shx, .dbf, and often .prj.
The conversion becomes necessary when an assignment requires you to use standard GIS tools for:
- Buffer analysis
- Spatial queries
- Overlay analysis
- Attribute-table editing
- Geoprocessing
- Cartographic layout creation
- Vector data management
Important: Converting KML to Shapefile does not preserve everything from Google Earth. Visual styling, folders, descriptions, images, and some advanced KML properties may be lost during conversion.
How to Convert KML to Shapefile in QGIS
QGIS provides one of the easiest workflows for converting Google Earth data into a Shapefile.
The basic process is:
KML → Load into QGIS → Select vector layer → Export → ESRI Shapefile
Step 1: Open QGIS
Launch QGIS and create a new project.
You do not need to create a new Shapefile first. QGIS can read the KML and then export the resulting vector layer into your required format.
Step 2: Add the KML File
There are several ways to load KML data.
The simplest method is to drag the .kml file from your file explorer directly into the QGIS Layers panel.
Alternatively, use:
Layer → Add Layer → Add Vector Layer
Browse to your KML file and select it.
Depending on how the KML was created, QGIS may display several layers or folders.
For example, a field survey KML could contain:
- Sampling points
- Survey routes
- Study-area boundary
- Observation polygons
Select the layer containing the features you actually need.
Step 3: Check the Geometry Type
Before exporting, identify whether your KML contains:
- Points
- Lines
- Polygons
This matters because a traditional Shapefile stores one primary geometry type per dataset.
For example, if your KML contains both sampling points and survey routes, you may need to export them separately:
sampling_points.shpsurvey_routes.shp
Do not assume that every object in a KML should become one Shapefile.
Step 4: Export the Vector Layer
Right-click the KML vector layer in the Layers panel.
Choose:
Export → Save Features As…
This is QGIS’s vector-layer export workflow.
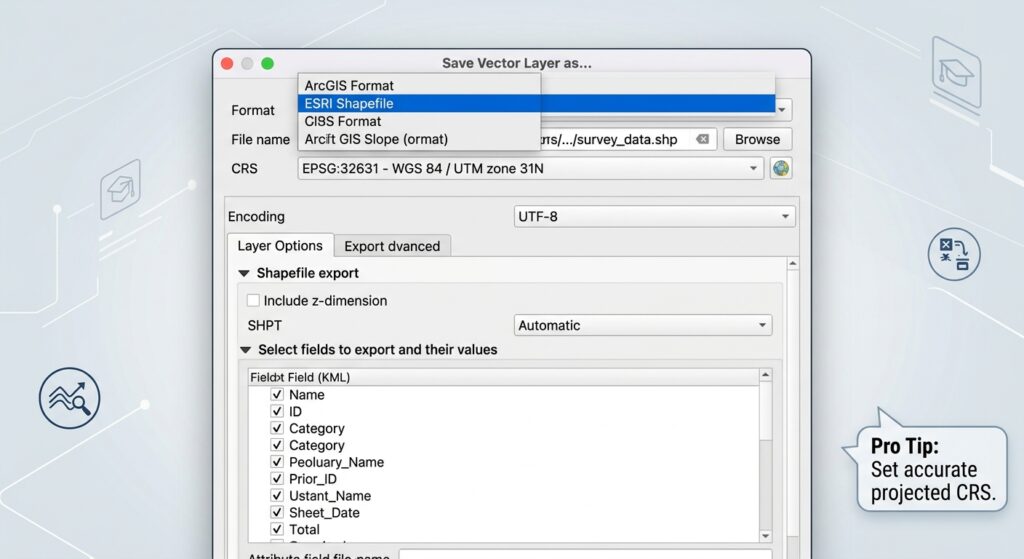
A dialog box will appear.
Set the following options:
Format: ESRI Shapefile
File name: Choose a suitable location and filename.
CRS: Select the coordinate reference system required by your assignment.
Encoding: UTF-8 is usually a sensible choice when your attribute data contains non-English characters.
Then click OK.
QGIS will create the Shapefile dataset.
Step 5: Check the Converted Data
After exporting, load the new Shapefile into QGIS.
Right-click the layer and select Open Attribute Table.
Check whether important fields such as:
- Name
- ID
- Description
- Category
- Coordinates
have been transferred correctly.
Also zoom to the layer and confirm that the features appear in the expected location.
QGIS CRS Tip
KML data is normally stored using geographic coordinates based on WGS 84, commonly represented as EPSG:4326.
Your university GIS project, however, might use a projected CRS such as a local UTM zone.
This creates an important distinction:
Display CRS ≠ exported CRS
QGIS can reproject layers on the fly for display, but when creating your final Shapefile, choose the CRS required by your assignment.
For distance and area calculations, a suitable projected coordinate system is generally preferable to simply keeping geographic latitude/longitude coordinates.
How to Convert KML to Shapefile in ArcGIS Pro
ArcGIS Pro provides a dedicated KML To Layer conversion tool, making the workflow particularly straightforward for students using Esri software.
The process is:
KML/KMZ → KML To Layer → Feature Class → Export Features → Shapefile
Step 1: Open ArcGIS Pro
Open your ArcGIS Pro project and make sure you have a suitable map available.
You can then open the Geoprocessing pane.
Search for:
KML To Layer
The tool is available under the conversion tools.
Step 2: Run KML To Layer
Open the KML To Layer tool.
You will generally need to specify:
Input KML File: Select your .kml or .kmz file.
Output Location: Choose an appropriate folder.
Output Data Name: Enter a meaningful name for the converted dataset.
Run the tool.
ArcGIS Pro converts the KML structure into GIS data, typically creating a file geodatabase and associated feature classes.
Step 3: Examine the Converted Feature Classes
Expand the resulting geodatabase in the Catalog pane.
You may find separate feature classes representing different geometry types or folders contained in the original KML.
For example:
- Points
- Polylines
- Polygons
Add the required feature class to your map.
Check the attribute table before exporting.
Step 4: Export the Feature Class to Shapefile
Once you have identified the feature class you need, right-click it.
Use the appropriate export option, such as:
Data → Export Features
Choose a folder as the output location and specify the Shapefile output.
Alternatively, ArcGIS Pro provides conversion tools for converting feature classes to Shapefiles.
Run the export and then add the resulting .shp to your map.
Step 5: Verify the Result
Check three things:
- Geometry: Are all features present?
- Attributes: Did the required fields transfer?
- Location: Does the data appear in the correct geographic position?
If the features appear far away from your other project layers, investigate the coordinate reference systems before continuing with analysis.
Pro Tip: Do not immediately delete the original KML after conversion. Keep it as your source dataset so you can compare the converted Shapefile against the original Google Earth data if something is missing.
Method 3: Batch Converting Multiple KMZ Files
A common GIS assignment problem occurs when you receive dozens of Google Earth files rather than one.
For example, a fieldwork project might contain:
site_01.kmz
site_02.kmz
site_03.kmz
site_04.kmz
Converting each file manually can become repetitive.
A batch-processing workflow can reduce this work.
Option A: Batch Processing in QGIS
In QGIS, open the Processing Toolbox and search for an appropriate GDAL conversion tool such as Convert format.
Depending on your QGIS version and the GDAL drivers installed, you can use the batch-processing functionality to process multiple inputs.
Look for the Run as Batch Process option.
Add your KML/KMZ files as separate inputs and configure the required output format.
If direct KMZ processing is unsuccessful, extract the KMZ files first and work with the contained KML files.
The general workflow becomes:
Multiple KMZ files → Extract/convert → KML layers → Batch conversion → GIS vector outputs
Always inspect the results afterward because different KML files may contain different geometry structures.
Option B: Batch Processing in ArcGIS Pro
ArcGIS Pro’s geoprocessing environment can also be used for repeated conversion workflows.
Run KML To Layer for your source files and use batch processing where appropriate.
The important point is that the first conversion normally produces GIS feature classes or a geodatabase structure. You may then need a second conversion step to create Shapefiles.
For a large university project, consider whether Shapefile is actually necessary.
If your professor allows it, a GeoPackage or file geodatabase can often be a better working format because it avoids several limitations associated with Shapefiles.
KML vs KMZ: What Is the Difference?
The distinction is simple:
| Format | Description | Typical Use |
|---|---|---|
| KML | XML-based geographic file | Google Earth and GIS exchange |
| KMZ | Compressed KML package | Smaller files with supporting resources |
| Shapefile | Traditional GIS vector dataset | Desktop GIS analysis and mapping |
A KMZ file should not simply be renamed from .kmz to .kml.
The two formats are structurally different.
A KMZ is essentially a ZIP-based package. It can contain the KML document plus resources such as images or icons.
Some GIS applications can open KMZ files directly. If yours cannot, extract the archive and locate the KML file inside.
Common Problems When Converting KML to Shapefile
1. Elevation or Z-Values Disappear
Google Earth can display features with altitude information. However, a basic Shapefile workflow may not preserve those elevation values in the way you expect.
If your assignment depends on elevation, inspect the converted geometry and attribute table carefully.
Do not assume that because a feature appeared at a particular altitude in Google Earth, that altitude has automatically become an attribute field in the Shapefile.
Pro Tip: If elevation is academically important, confirm whether the original KML contains actual altitude information and whether your chosen GIS export workflow preserves it.
2. Google Earth Colors Disappear
A red Google Earth polygon does not necessarily become a red polygon in your GIS.
KML supports styling information that is different from standard Shapefile storage.
The geometry and attributes may transfer successfully while the original Google Earth colors, icons, line widths, or transparency settings do not.
This is normal.
You can recreate the appearance in QGIS or ArcGIS Pro using the Symbology tools.
3. KMZ Is Not the Same as KML
A .kmz file is compressed.
If your GIS software cannot read it correctly, extract the archive rather than simply changing the filename extension.
Look for the .kml document inside the extracted folder.
4. Attribute Names Are Changed
Shapefiles have important technical limitations, including restrictions on field names.
Long KML field names may therefore be shortened or modified during export.
For example:
population_density_2026
might not remain identical in a traditional Shapefile workflow.
Always inspect the attribute table after conversion.
5. Multiple Geometry Types Need Separate Outputs
A KML can contain points, lines, and polygons.
A traditional Shapefile is designed around a single geometry type.
Therefore, you may need to create separate outputs:
field_points.shp
field_routes.shp
study_boundary.shp
This is not a conversion error. It is a consequence of how the data structures differ.
How to Check Your Converted Shapefile Before Submitting
Before adding the dataset to your GIS assignment, perform a quick quality-control check.
Check 1: Geometry
Zoom to the converted layer.
Make sure every expected feature is present.
Check 2: Attribute Data
Open the attribute table.
Check that important names, IDs, categories, and descriptions transferred correctly.
Check 3: Coordinate Reference System
Open the layer properties and confirm the CRS.
Compare it with the CRS required by your assignment.
Check 4: Spatial Alignment
Add another known reference layer.
For example, if your assignment involves roads, administrative boundaries, or satellite imagery, compare the converted KML features against those datasets.
If the layers do not align, investigate the CRS before performing analysis.
Check 5: File Components
Remember that a Shapefile is a collection of related files.
Do not submit only:
field_data.shp
Your dataset will normally also need associated files such as .shx, .dbf, and .prj.
Pro Tip: Keep all Shapefile components in the same folder and avoid manually renaming individual components. If you move or rename the dataset, treat the related files as one unit.
Quick Workflow Summary
If you need the shortest possible version of the process, use this checklist.
QGIS
1. Open QGIS
2. Drag the KML into the Layers panel
3. Select the required point, line, or polygon layer
4. Right-click → Export → Save Features As…
5. Select ESRI Shapefile
6. Choose the correct CRS
7. Save and inspect the output
ArcGIS Pro
1. Open ArcGIS Pro
2. Open Geoprocessing
3. Search for KML To Layer
4. Select the KML/KMZ input
5. Run the conversion
6. Locate the resulting feature class
7. Export the feature class to Shapefile
8. Check geometry, attributes, and CRS
Multiple KMZ Files
1. Organize the source files
2. Extract KMZ files if necessary
3. Use QGIS or ArcGIS Pro batch processing
4. Convert the resulting vector layers
5. Check each output for geometry and CRS errors
Frequently Asked Questions (FAQ)
Why is my converted Shapefile missing point colors from Google Earth?
KML stores styling information differently from Shapefiles. During conversion, geometry and attributes may transfer while Google Earth colors, icons, and other styling do not. Recreate the desired appearance using QGIS or ArcGIS Pro symbology.
What is the difference between KML and KMZ?
KML is an XML-based geographic file. KMZ is a compressed package containing KML and potentially supporting resources such as images or icons. GIS software may support both formats directly, but KMZ can also be extracted to access its KML contents.
How do I handle projection mismatches after converting KML to Shapefile?
KML commonly uses WGS 84 geographic coordinates. Check the converted layer’s CRS and reproject it into the coordinate system required by your GIS project. For accurate distance or area calculations, use an appropriate projected CRS.
Conclusion
Knowing how to convert KML to Shapefile is an important practical skill for GIS students because Google Earth data is frequently used during fieldwork, preliminary digitization, and data sharing.
In QGIS, the simplest workflow is to load the KML, select the required vector layer, and use Export → Save Features As… to create an ESRI Shapefile.
In ArcGIS Pro, use KML To Layer first, then export the resulting feature class to Shapefile.
For multiple KMZ files, batch-processing tools can reduce repetitive work, but always inspect the resulting layers individually.
Most importantly, do not treat conversion as the final step. Check the geometry, attributes, CRS, elevation information, and spatial alignment before using the data in your GIS analysis.
Once the data has passed those checks, you can confidently continue with buffering, overlay analysis, spatial queries, cartographic design, or other GIS lab requirements.
If you want, I can also turn this into a more SEO-aggressive 2,000-word version with stronger H2s, FAQ schema-style answers, internal-link anchors, and screenshot cues positioned specifically for a GIS academic website.